Has your windows 10 start menu not working? Then this page will guide you on how to fix this windows 10 menu not working issue easily without any hassle
Windows OS has been the most used operating system for PCs. It offers great features and stability but also comes with several bugs that can annoy the user. One such bug is the Start menu not working bug. The Start menu freezes and it becomes impossible for you to do anything on your PC.
In this article, I am going to give you a brief description of this bug, which causes this bug and obviously how to fix this bug and continue using your PC without any inconvenience.
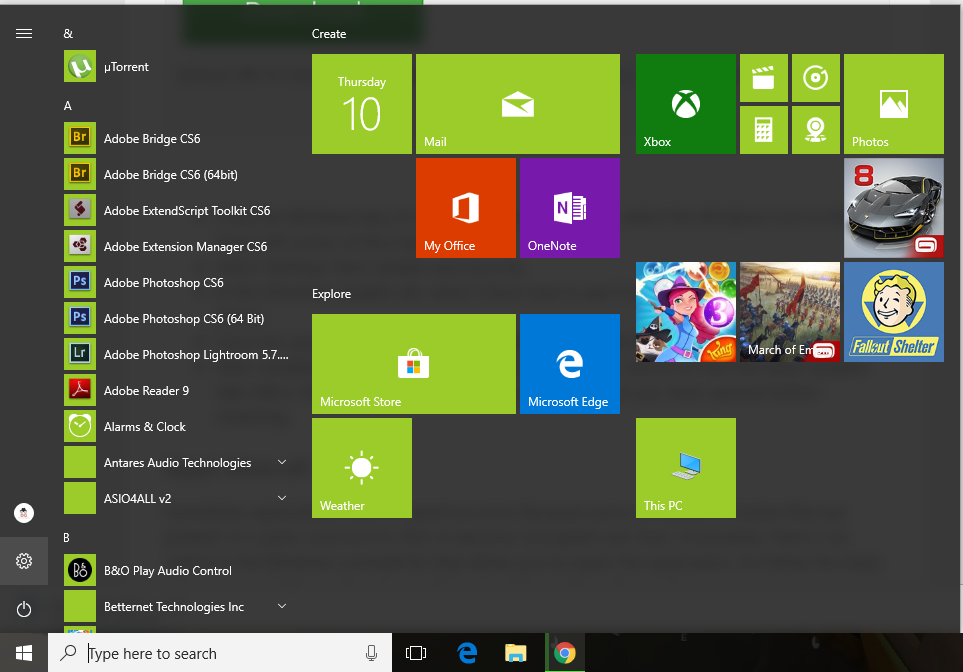
What is Windows 10 start menu stops working bug?
Sometimes due to corrupt files, the windows start menu stops working and it freezes making it impossible for the user to continue using the PC. This bug is quite common since windows files can often get corrupt or faulty windows updates might mess things up for proper functioning of the OS.
What causes the Windows 10 start menu stopped working bug?
There can be many reasons for this bug to occur. Some of them are
- Corrupt system files: Due to corrupt files, the start menu fails to function smoothly and freezes
- Windows Updates: Due to faulty windows updates, this bug might be encountered by users.
- Antivirus: In very rare cases, the antivirus blocks the functioning of some windows features. Here, the start menu feature might be blocked by the antivirus.
How to fix Windows 10 start menu not working bug?
Here, I am going to show you the best possible methods that can help you fix the Windows 10 start menu stopped working bug.
Hence, follow the methods given below to fix the bug.
Note: Before trying any method out, just restart your PC. Sometimes turning your PC On and Off can fix this.
If not then here are the methods.
1. Update Windows 10
The most common fix for this bug is that you simply update your windows 10. This is because sometimes windows updates can cause this bug. So updating windows to the newer version will fix the bug.
Here are the steps on how to update your Windows 10.
- Press Windows+ I to go to Control Panel.
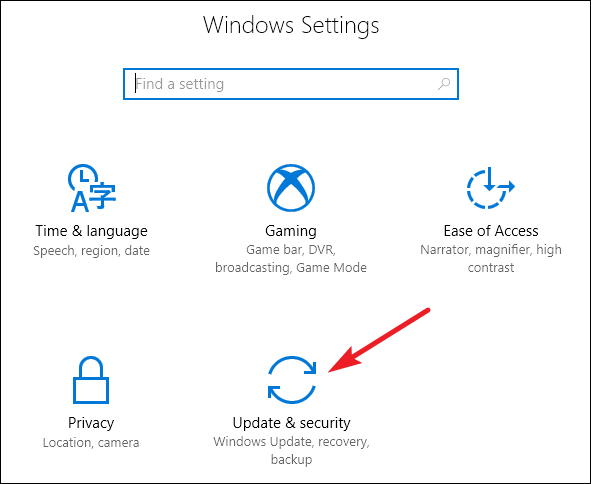
- Click on Update and Security.
- Click on Check for updates and download it.
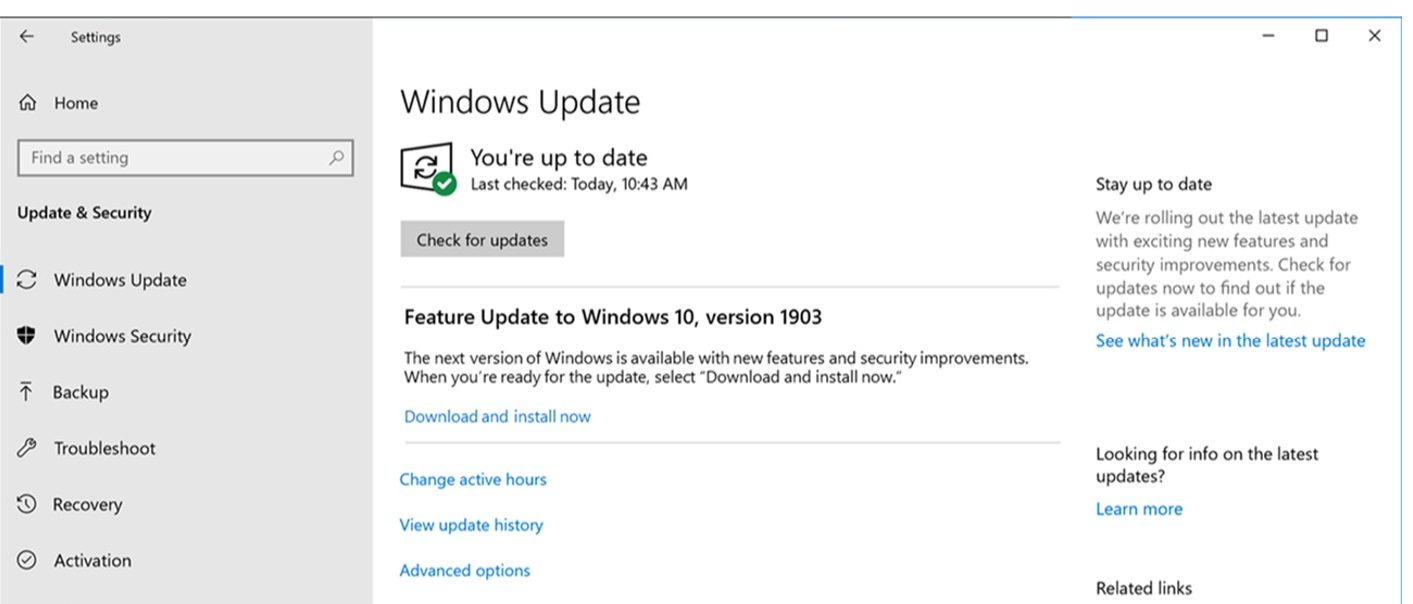
- Let Windows update automatically and restart your PC after the update.
The start menu should work fine after the update.
Note: If your windows 10 is already up-to-date then follow the other methods.
2. Update Powershell Settings.
Enter the following code in powershell to fix the bug.
- Press Windows + R and type cmd.
- After entering Command Prompt, type powershell and press enter
- Then copy the following code Get-AppXPackage -AllUsers | Foreach {Add-AppxPackage -DisableDevelopmentMode -Register “$($_.InstallLocation)\AppXManifest.xml”} .
- Press Enter
The bug should be fixed by this
3. Create a new user in Windows 10
Create more than one user account with Administrative privileges. By doing so you can perform the step which is mentioned below.
To create an account in windows 10
- Press Windows + R to go Control Panel
- Go to User Accounts and then click on Change Account type
- Then click on Add new user
Create the account with administrative rights and you’re good to go.
The steps you need to follow are
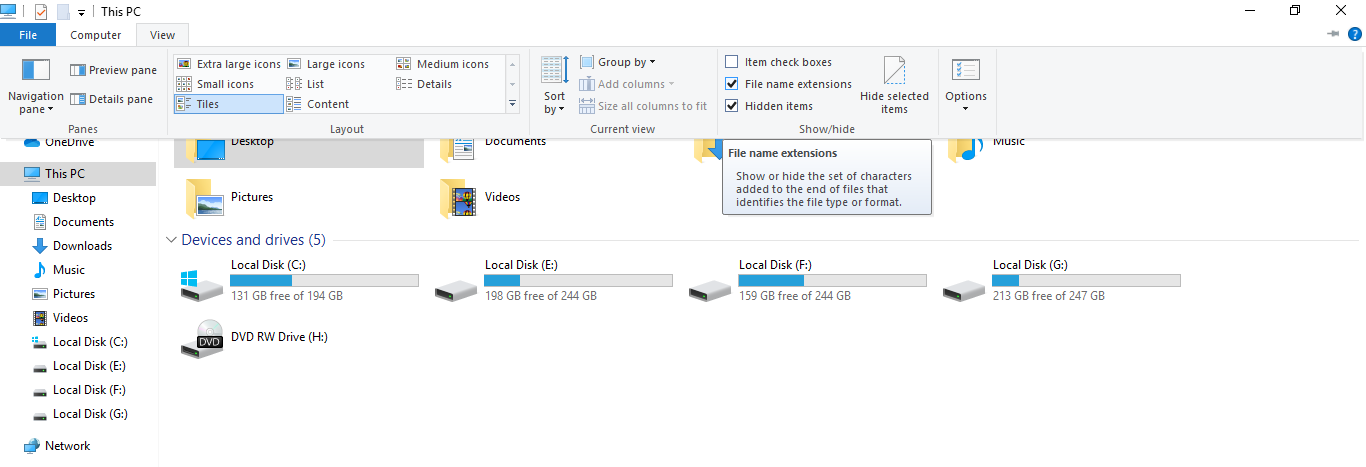
- Open File Explorer and enable the File name extension option.
- Now log off this account, and log in to the administrative account you created.
- Now go to the address :\users\\Local\TileDataLayer\Database
- You will find a folder that has 8 files in them. Now replace it with the administrative account’s folder.
By doing this, you replaced the settings of your main user account by logging in to another admin account. This is because Windows doesn’t let you update file settings of the same account when logged in.
Now when you log off this admin account and log in to your main user account, the start menu should be working fine.
4. Scan system files through Command prompt.
Windows has a built-in system file checker that checks if the system files are running well or are corrupted. It shows the files which are corrupted(if any) and tries to fix them. If it cannot, you have to manually fix those files using other software.
- Press Ctrl+Alt+Delete and select Task Manager from the menu which appeared.
- Go to File on top of the Task manager and click on Create a new task
- Type cmd and tick the Create task with administrative privileges
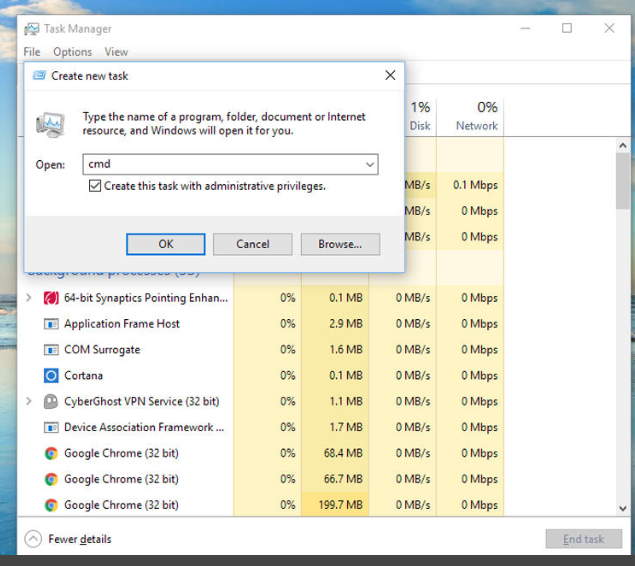
- The command prompt will open now. Type in sfc /scannow and press Enter
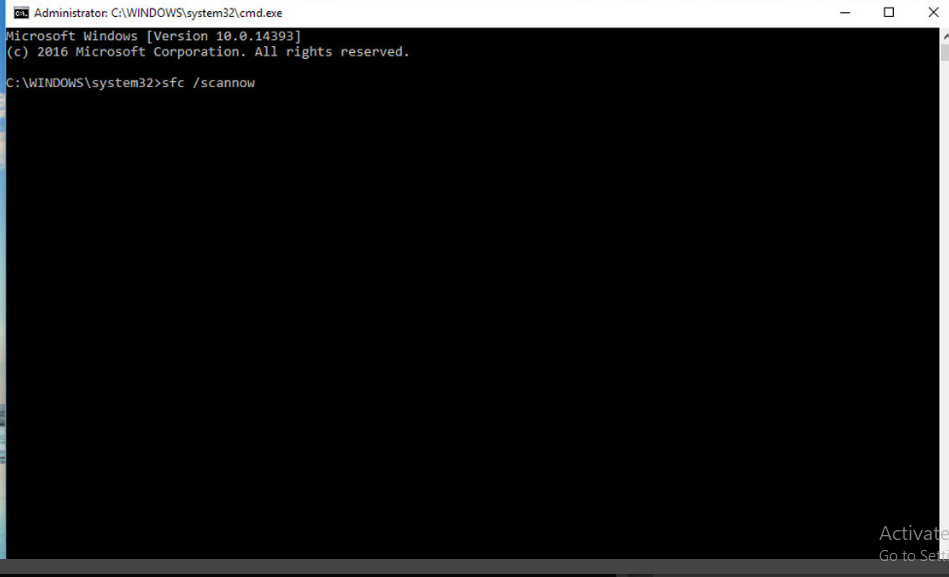
- Now Windows will scan for any corrupt files in the system and will let you know about it.
- If you see any message that says Windows Resource Protection found corrupt files but was unable to fix some of them then you need to run another program to manually fix the problem.
- So type DISM /Online /Cleanup-Image /RestoreHealth including the spaces between the words and press Enter.
- Now, this might take some time so let your PC do the job.
- After the repair, run the sfc /scannow code again to check if the problems are fixed or not.
The problem should be fixed by this method.
5. Run Troubleshooter for Start menu
Since Microsoft also came to know about the bug, they implemented a troubleshooter for the start menu on their website.
Click on this link to go to the troubleshooter
This troubleshooter will check if the Start menu feature is installed correctly in your OS and whether registry key permissions and database corruptions are available.
Conclusion
These are the best possible ways in which you can fix the Windows 10 Start menu stopped working bug. I hope you were able to clearly understand and perform the steps to fix the bug.
If the problem isn’t resolved or you are facing difficulty in understanding or performing any of the steps, feel free to comment down below.
Also read: Internet Explorer Has Stopped Working [FIXED]
