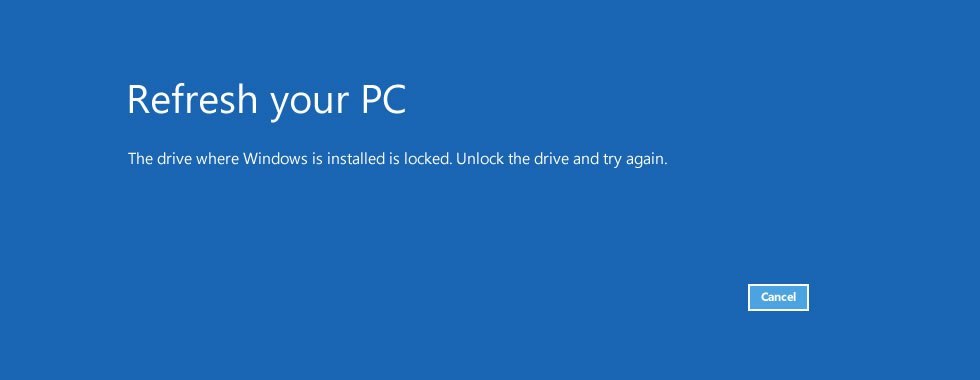
“The drive where windows is installed is locked”, is an error you encounter while trying to restart your system. This generally occurs when you try to restart you PC in an attempt to fix some other error.
The users find this error particularly cumbersome because it denies them access into their system.
What is “The drive where windows is installed is locked” error?
Unlike most errors, the drive where windows is installed is locked error screen isn’t identified by an error code. It usually occurs when you are trying to repair your Windows 8.1 or Windows 10 operating system either via a USB or a DVD .
Causes of the error
The main causes for this error are : The Master Boot Record(MBR) or the Boot Configuration Data(BCD) file could be damaged, the Windows System files could be corrupted,there could be multiple errors on the hard disk,the Trusted Platform Module(TPM) could have been cleared or reset or the bitlocker boot agent could be disabled.
How to fix “The drive where windows is installed is locked” error?
Although this error poses to be quite annoying,it does have a few simple fixes. The following five methods can be quite useful in helping you rectify this error.They have been listed in decreasing order of popularity.
Method 1:Run automatic system repair
Automatic Repair utility is available in Windows 8 and Windows 10. This utility could fix The drive where windows is installed is locked error. To accomplish this however, you need a genuine Windows bootable DVD/USB.
- Insert the bootable media into the right drives and the reboot your system.
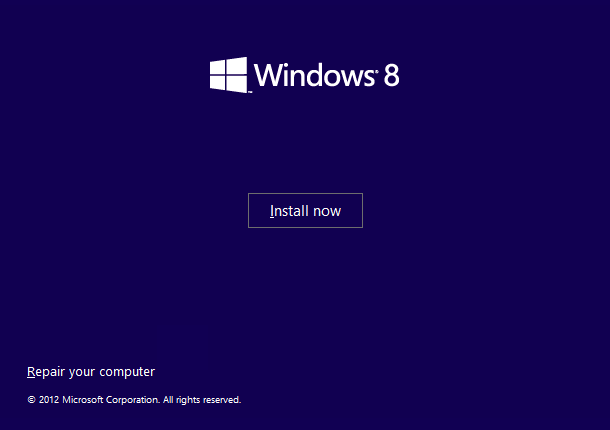
- When you get into the Windows install window, click on Repair your computer.
- After this Navigate to Troubleshoot > Automatic Repair.
- Continue with the wizard to complete the process for fixing the problem.
NOTE: If you do not have a bootable media and need to create one,follow these steps:(This shows how to create a bootable USB drive with the Windows utility program DiskPart
- Plug the USB drive into your computer’s USB port.
- Press the windows key and R at the same time to open the run dialogue box , type cmd and press enter.
- Select “Run as administrator” from the context menu. This opens a small window with white text on a black background.
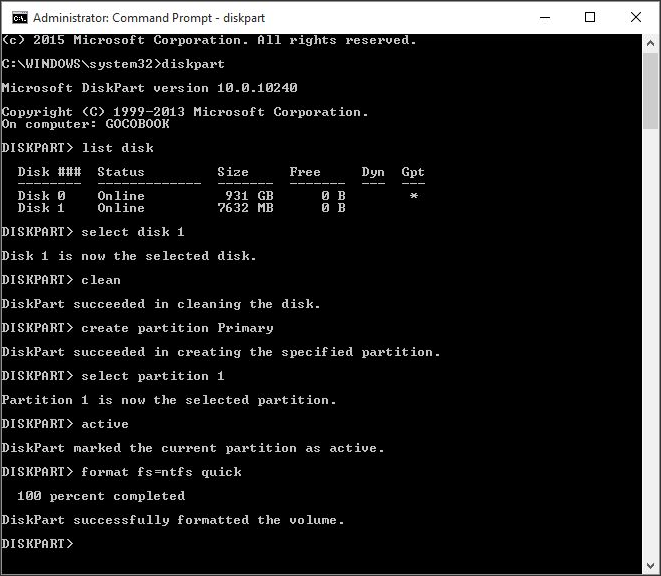
- On the black screen that appears type diskpart and press enter. This starts the storage device manager
- Enter the command “list disk” to display all available storage devices.
- You can recognize your USB by its storage capacity, and it’s usually listed as “disk 1”. In the system partition, “disk 0” is usually your PC, so a hard drive or solid state drive in your computer.
- Based on the assumption ,type the words sel disk and the corresponding number after a space(e.g. sel disk 1) and press enter
- Enter the command “clean” to delete all files from the USB.
- Type “create partition primary” to create a main partition.
- Now type “list par” and select the newly created main partition with “sel par 1”.
- Activate the partition with the command “active”.(Press enter after each command)
- Format the USB with the command “format fs=FAT32 label=“WINDOWSUSB” quick override” .It will start formatting and this might take a while.
- As soon as the process is finished, enter the command “assign” to automatically assign a drive to your USB.
- Enter “exit” to close DiskPart, and then “exit” again to close the command prompt.
- To finish the process, you just have to copy the Windows ISO file to a bootable USB stick.
Method 2: Using bootrec.exe tool
The bootrec.exe tool is a built-in tool in Windows. This step also required a genuine Windows bootable DVD/USB. Follow the steps mentioned above if you want to create such a device. The major purpose of using this tool is to rebuild the Boot Configuration Data (BCD)that controls how the Windows is started. As mentioned earlier, when this is faulty it creates the The drive where windows is installed is locked error.
- Restart your computer
- Insert the bootable media into the appropriate device
- Reboot the computer and press any key if prompted to do so.
- Select the correct language, time, currency ,keyboard and click on Next.
- Choose the operating system that needs repair and click on Next.
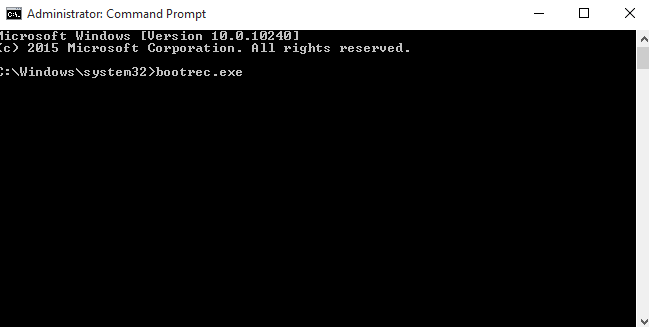
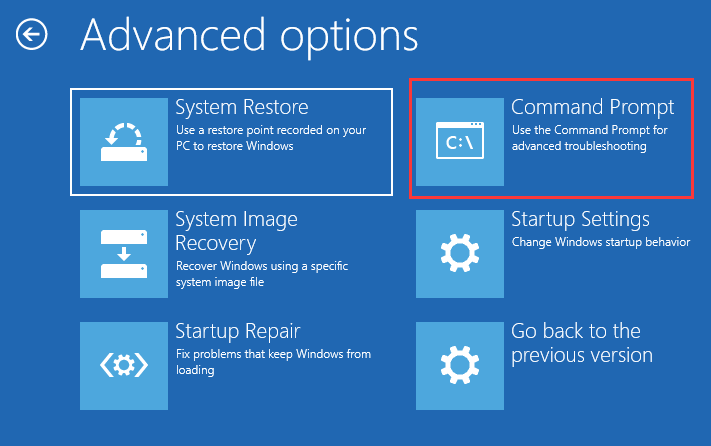
- Now, inside System Recovery Options, select the Command Prompt.
- On the black screen that appears,type bootrec.exe and press enter. This will start rebuilding the BCD and your system will be back to its normal state.
The utility will automatically begin to run. If this however does not work try rebuilding it with a different set of commands as shown below. Before we begin,delete the previous BCD.
Alternative method:
- Restart your computer and insert the bootable media into appropriate ports
- Reboot the computer again and press R. Click Troubleshoot and the click on Command Prompt.
- Type the following commands and press enter after each
- bootrec/FixMbr
- bootrec/FixBoot
- bootrec/ScanOs
- bootrec/RebuildBcd
Once again, the utility will automatically begin to run. If this also does not work we have a few other methods that could potentially fix this problem.
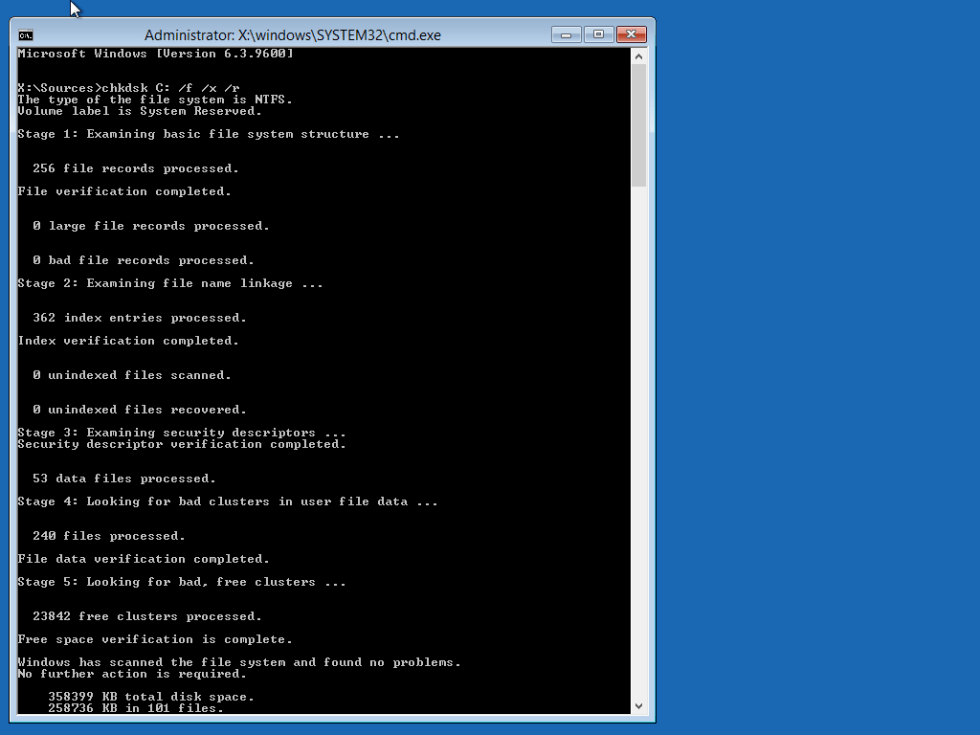
Method 3:Check the disk for errors using the chkdsk command
CHKDSK is a command that you can be run in Command Prompt to verify the logical integrity of the file system. The full name of CHKDSK is actually check disk. As the name suggests, it is designed to check disk for errors and then fix it. One of the many reasons for this problem could be errors in the disk. This command will help us get rid of those errors. This is yet another method that requires a bootable media
- Insert the bootable media into the right drives of your system and the reboot your system.
- Select Repair your computer > Troubleshoot > Advanced Options > Command Prompt.
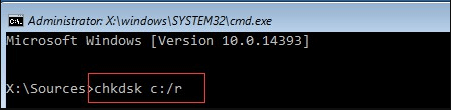
- On the black screen that appears, type chkdsk C: /R or chkdsk C: /F and press enter. Here, C is the drive your Windows is installed. If it is installed in some other drive(say D) then change the command
-
Type exit and press Enter to leave command prompt. After that, restart your system.
This helps to remove all the errors present in the disk. After restarting your system ,check if the error appears again. If it still persists,then look into the solutions below to help you fix your problem.
Method 4:Use system file checker(SFC) to repair damaged files
System File Checker (SFC) is a utility in Windows that allows users to scan for corruptions in Windows system files and restore corrupted files.
- Open the command prompt window by typing cmd in the Windows search bar
- On the black screen that appears type sfc /scannow and press enter.


- Now this will begin to scan for corrupted or missing files in your system. It will also proceed to fix those errors.
- Once this is done,reboot your system.
This will remove all the damaged files and thus help in solving the problem. We have yet another method for you if this does not work.
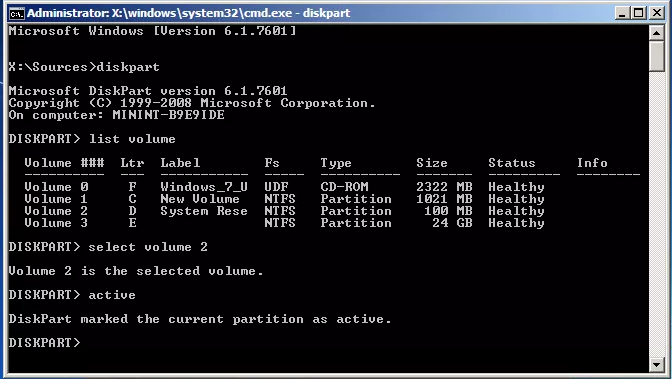
Method 5:Use diskpart
The drive where windows is installed is locked error could also occur if its primary hard drive partition is no longer configured as the active one. In that case,set your primary hard drive partition as the active one.
- Insert Windows installation disk or Recovery media into your computer
- Restart your computer and boot it from the media
- Once you are at System Recovery Options (for Vista or 7 systems) or Troubleshoot (for Windows 8 and 8.1), click Command Prompt.
- Inside the command prompt type diskpart with no quotes and press enter
- Type select list 0 and the press enter. 0 is the disk’s number where your Windows is installed on. For a full list of disks that are available on your computer, type list disk.
- Now type list partition and press enter. After this type select partition 1,where 1 your primary disk position. Type active and press enter.
- Restart your computer
This will set your primary active partition to one.
Conclusion
This error can prove to be infuriating as it normally occurs while you are trying to fix some other error. Hopefully the methods listed above,helped you fix this problem.