Windows 10 was a remarkable update to an already glorious operating system.With the newer build to Windows 10, a lot of new and great things became possible. One amazing feature of using Windows 10 is that you can have your personalized settings among all your Windows devices. This ability to sync settings was introduced in Windows 8, but in Windows 10 it is even better! However, people often seek help to sync settings in Windows 10. Therefore in this post, I’m presenting a “guide” to the question that Windows 10 users often have in their minds, “How do I sync settings in Windows 10?” I will tell you how to sync settings in Windows 10 in the simplest manner.

What should you know about Windows Sync Settings?
Windows Sync Settings are a part of the operating system since Windows 8. However, they got a makeover and some important advancements in Windows 10. The sync settings did not become really popular in Windows 8. This was assumed to be due to two factors: (i) A lot of users didn’t upgrade to Windows 8 and, (ii) Sync settings were placed in a rarely visited place. However, Sync settings in Windows 10 have proved to be a success. The reason behind this is that: (i) most of the Windows 7 users finally upgraded their systems, and (ii) Sync settings in Windows 10 are placed in an appropriate place. Let’s begin with a quick comparison between the Sync settings in Windows 10 and 8.
Location of Sync Settings in Windows 10 and 8/8.1
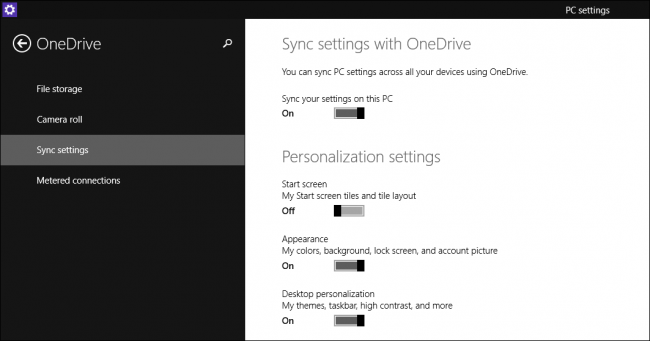
In Windows 8 and 8.1, the sync settings are placed in the OneDrive group. Logically, the decision was right to have the sync settings in OneDrive group, but practically, the decision was a failure. The reason for failure was that majority of the Windows users are just casual users who are not very curious. OneDrive group was an unlikely place for these casual users to visit. A lot of other items were also wrongly placed in Windows 8, but that could a different topic to discuss.
In Windows 10, the sync settings are moved to the Accounts group. Also, they are now renamed as “Sync your settings.” The number of options are also reduced to seven. All these changes made the Sync settings in Windows 10 way more manageable for even the casual users.
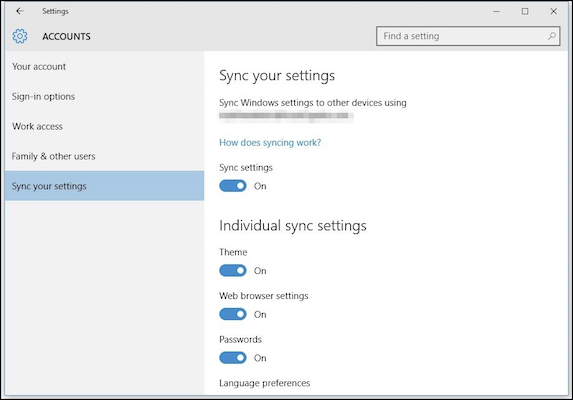
7 Options of Sync Settings in Windows 10
The first option that you find is to turn the Sync Settings in Windows 10 on and off. If you turn off the Sync Settings, your account on that particular computer becomes local, doesn’t matter if it is a Microsoft account. This means that the changes you make to any of the settings on this particular Windows 10 computer will not take place on the other devices you log into with the same account.
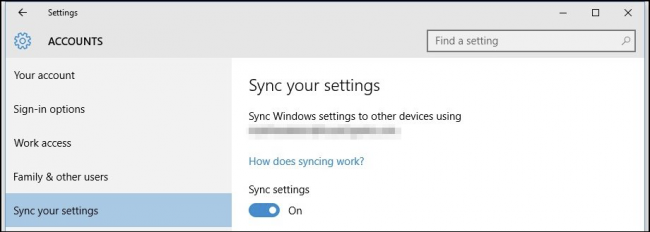
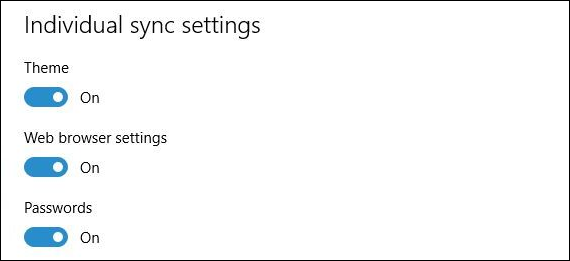
Below this, you will find the individual sync settings. These are the settings that will move from one computer to the other that you log into with your particular Microsoft account.
Individual Sync Settings in Windows 10
- The “Theme” setting will sync your color and background selections. This means that if you want different colors and backgrounds on your different computers, you should keep it turned off.
- “Web browser settings” will deal with the new default browser on Windows 10, the Edge browser’s settings. This sync setting will apply to the settings of Edge browser like bookmarks, themes, logins, etc. I suggest you keep it turned On.
- The “Passwords” settings make sure that any passwords you save on one Windows 10 system are synced to the others. This saves you from typing your passwords again and again. You decide whether you need this turned on or off.
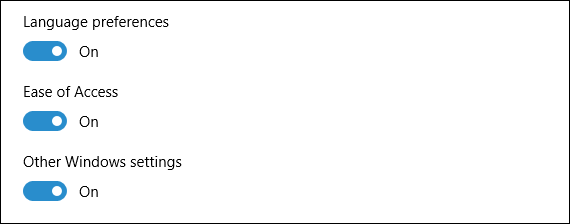
- The “Language preferences” is a setting which is very useful if you use Windows multilingually.
- “Ease of Access” sync setting is to move all the adjustments you make on one system to its accessibility to all your Windows systems.
- Ultimately, the “Other Windows settings” can be used to sync desktop items like window accents, taskbar position, etc.
How to Sync Settings in Windows 10
You must have a Microsoft account in order to use the sync settings in Windows 10. If you don’t have it yet, I strongly recommend you make one. Scroll down, I have made a tutorial for you people too. For those having a Microsoft account, proceed with these steps:
Step-1: Firstly, click on the Start button.

Step-2: Next, click on the Settings icon.

Step-3: In the Settings window, click on Accounts.

Step-4: If you are not yet signed in to your Microsoft account, click on Sign in with a Microsoft account instead. If you are already signed in, skip to the next step.

Step-5: Now click on Sync your settings.

Step-6: Turn on the switch present under Sync settings. Do the same from Step-1 to Step-6 on your other Windows systems.

Step-7: Select what settings you need to sync from the Individual settings section.

Done. That’s all.
Tutorial: How to make a Microsoft account in Windows 10?
Step-1: Firstly, Open the Microsoft Windows Account page, and choose “Create a free Microsoft account.”

Step-2: Fill your personal information and enter a password. Choose “Get a new email address” if you want your Microsoft account to be separate from your personal account.

Step-3: Now enter the captcha code correctly to verify that you are not a robot.

Step-4: Next click on Create account.

Step-5: Finally, open your mailbox, open the mail for verification of email address and verify your Microsoft account.

Done. Now you have got your Microsoft account. You can now learn to sync settings in Windows 10 with the help of Guide present above.
Summary
The ability to sync settings among several devices is a great benefit of using Windows OS. You can get your personalized settings on whichever system you log into with your Microsoft account. This is one very useful feature for all kinds of users. You can also choose which settings you need to sync and which you don’t. Also, you can altogether choose to not sync and start syncing again whenever you wish.
For any queries, doubts, or suggestions, do visit the Comments sections present below. Hope I helped you. Have a nice day, Folks!
