After logging in Windows 10 if you encounter a window in the top right corner displaying “Personalized Settings (Not Responding)” and get stuck on a black screen, going through this guide will help you in repairing it. You end up getting stuck on this black screen because Windows Explorer doesn’t start properly and so the desktop ends uploading very slowly, or not at all.0
This issue most often happens due to problems with updates. If you’re welcomed with a dark screen with this Personalized Settings (Not Responding) box in the upper left after Windows Update, don’t get scared. Many users have complained the same.

Task Manager is a part of the Windows that comes pre-installed with all versions of Windows. It was previously known as the Windows Task Manager. Task Manager, as its name implies, is a tool that provides an overview of all the tasks and processes running on your system. Task Manager also provides an overview of the background tasks which includes both Window’s own background services and third-party application services. It gives detailed information about the processes and applications.
This information includes the CPU and RAM utilization, Network usage, Disk usage (read/write), number of process instances, and a lot more. You can also use the Task Manager to start and stop services or applications. The ability to stop services comes in very handy in situations where a service or application stops responding. You can use the Task Manager to forcibly terminate a service. This issue presents itself after a Windows Update. Installing a Windows Update triggers a reboot.
This reboot is important for the complete installation of Windows Update. Once you reboot the system after a Windows Update, Windows will ask you to enter the login credentials and you’ll see a white or black screen afterward with a personalized settings (not responding) message at the top.
Why Are Your Personalized Settings Not Responding?
There are a couple of things that can cause this issue. The first and the most common thing that causes this issue is your File Explorer not being able to start. This is obviously caused by the Windows Update.
That is the reason this is happening right after a Windows Update. The second thing that can cause this issue is your peripheral drivers. The latest Windows Update cannot start your device’s drivers (because of a bug) which leads to this issue. So, disconnecting your devices before the reboot or force starting the File explorer usually resolves this issue.
How To Fix Personalized Settings Not Responding Error
Here are some of the effective methods that will help you in fixing this error.
1. Open File Explorer/Windows Explorer
This problem can be related to the File Explorer not starting up properly. So, one of the solutions to get rid of this issue is to simply start the File Explorer. One of the ways to open File Explorer is to open Task Manager and run a new task from there. You should be able to do this from the Personalized settings (not responding) screen as well. Simply follow the steps given below to open a File Explorer via Task Manager
- Hold CTRL, SHIFT, and Esc keys simultaneously (CTRL + SHIFT + ESC) to open the Task Manager
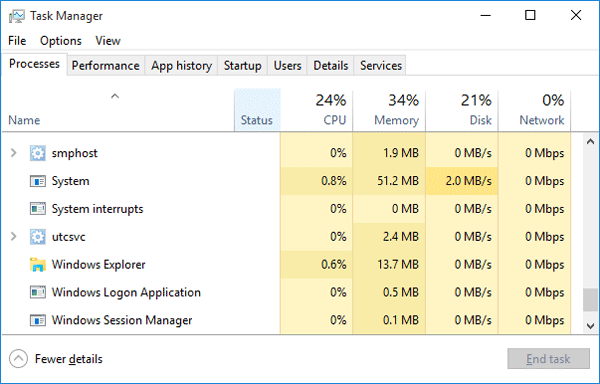
- Click File
- Select Run new task
- Type explorer and press Enter

This should let you get to the Desktop. Once you are on the desktop, wait a few minutes and then reboot and you should be able to get to the Desktop without any problem.
Note: If this doesn’t resolve the issue or you can’t start the File Explorer then open the Task Manager again. Right-click the File Explorer from the Process tab and select End Task. You might notice that there is a (Not responding) message beside the File Explorer. Once done, follow the steps given above and check the box.
2. Restart Your Computer
- On your keyboard, press Ctrl, Alt, and Del keys at the same time.
- In the bottom right of your screen, click the Power button

and choose Restart. - Hopefully, your desktop comes up normally this time. If not, continue with Fix 2.
3. Delete A File In Regedit
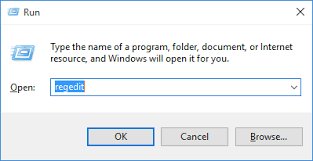
- On your keyboard, hit the Windows logo key and write regedit, then right-click on regedit and press Run as administrator.PressYes when prompted to verify.
- Check and hit double-click on HKEY_LOCAL_MACHINE > SOFTWARE > Microsoft > Active Setup > Installed
 Components.3. Right-click on the last file and Press Export to back up the file.
 If this solution doesn’t help with the condition, you might want to import the file to restore the backup.
 - Right-click on the last file and press Delete.
- Reboot your computer and see if your desktop comes back.
4. Repair Corrupt Files
The reason behind the issue could be corrupt files. In this method, we will try repairing them. Follow these steps to do so.
Step 1. Press the Windows logo key on your keyboard to open the start menu and type cmd. Here, right-click on Command Prompt in results and select Run as administrator.
Step 2. In the command prompt tab, Write the following and hit Enter:
SFC /scannow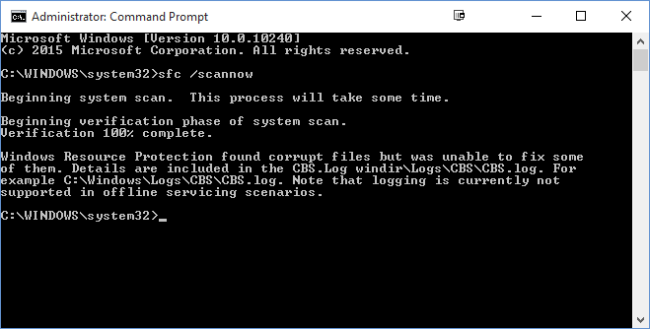 Step 3. After step 2, the scan will take some time to fix the corrupt files. When it’s done, restart your computer.
This should solve the problem. If the issue still Continues, try the next method.
5. Scan Your Disk
File System issue is equally problematic for the Personalized Settings not responding concern. So check it using these steps:–
Press Win+E to launch File Explorer.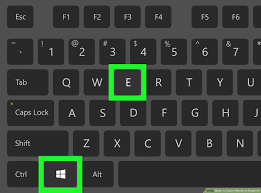 Do a click on This PC from the left column.
Now perform a right-click on C Drive from the right pane and then select Properties. 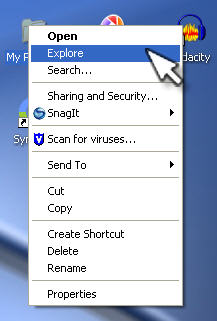 We assume that C is the system drive on your computer. Once a Window displayed, switch to the Tools tab and press on Check placed under Error Checking.
 Once done, Restart it to view the changes.
Conclusion
These were the possible ways to fix this “personalized settings not responding”issue. I hope these methods would help you in fixing this error. If you face any difficulty in fixing this error please let me know in comments sections.
If you still need help with anything at all, do let us know in the comments section below and we shall get back to you with a solution as soon as possible.
