Updating the Standard Sata AHCI Controller can be a tricky task. Recently there has been an increased number of enquiries across the internet regarding this particular issue. If you too are facing the same difficultly, there is no need to worry. Read along to find out ”How to update Standard Sata AHCI Controller’.
Before moving forward with the methods to update the Standard Sata AHCI Controller, let us first understand what it is. In case you are just interested in the method itself, feel free to skip this part straight to the ‘how to’ section.
What is AHCI Controller?
AHCI stands for advanced host controller interface. It is the technical terminology for the interface that enables the software to communicate with the Serial ATA. These are the peripheral components which interconnect (PCI)-class devices move data between system memory and SATA storage media.
Now that we know all about the Standard SATA AHCI Controller, let’s get straight to the method on how to update it.
How to update Standard SATA AHCI Controller
Method #1. Update it manually using Device Manager
To update the Driver manually follow the below given steps:
- Determine the manufacturer of your Sata controller.
- Go to the manufacturer’s official website.
- Determine your Windows Version (for example, Windows 32 bit)
- Find the driver corresponding with your Windows version.
- Download the driver manually.
- After downloading the correct driver for your system, double-click on the downloaded file and follow the on-screen instructions to install the driver.
Steps to install the driver
Follow the below steps to install the driver:
- Use Windows shortcut keys Win + X to launch the Jump List and select Device Manager.
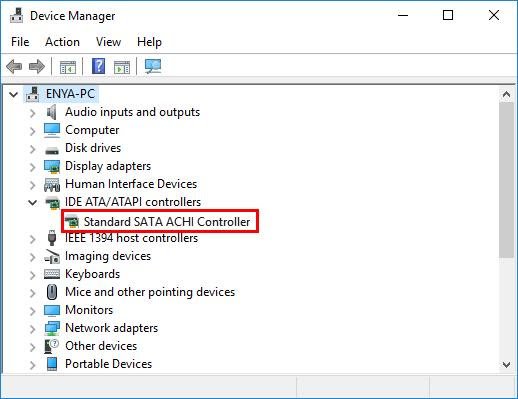
- Expand the IDE ATA/ATAPI controllers entry.
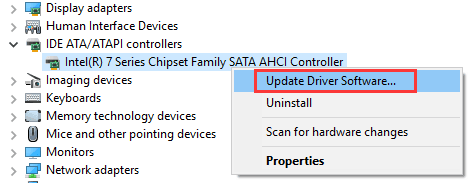
- Navigate to your SATA AHCI controller, which is the device you are going to install the driver on.
- Right click on it and select Update Driver Software.
- Click on Browse my computer for driver software.
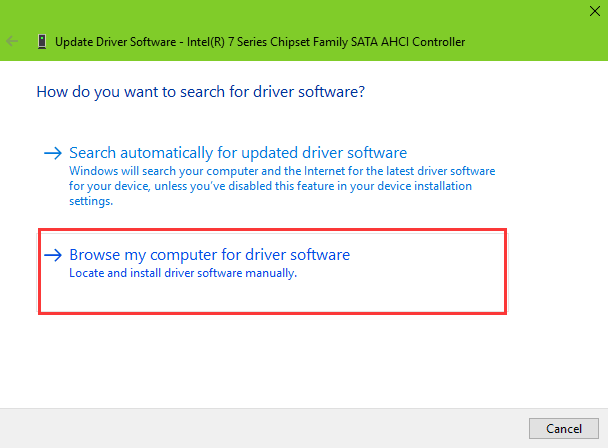
- Click on Let me pick from a list of device drivers on my computer.
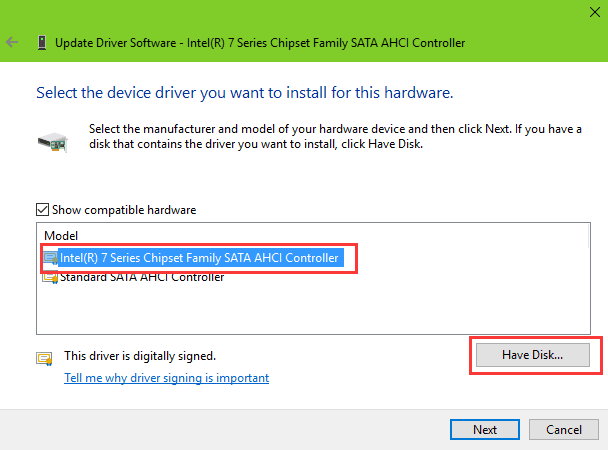
- Choose the model from the box
- Click on Have disk.
- Select Browse to locate the SATA AHCI driver file you’ve stored, and then click OK to install the driver.
Method #2. Update it automatically using Device Manager.
To update it automatically using Device Manager, follow the following steps:
- Use Windows shortcut keys Win + X to launch the Jump List and select Device Manager.
- Expand the IDE ATA/ATAPI controllers entry.
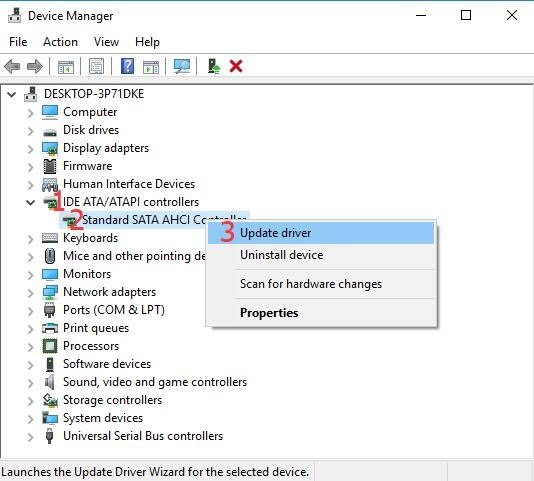
- Navigate to your SATA AHCI controller, which is the device you are going to install the driver on.
- Right click on it and select Update Driver Software.
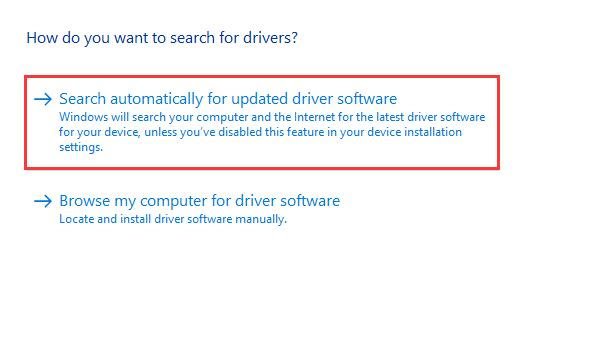
- Choose Search automatically for updated driver software.
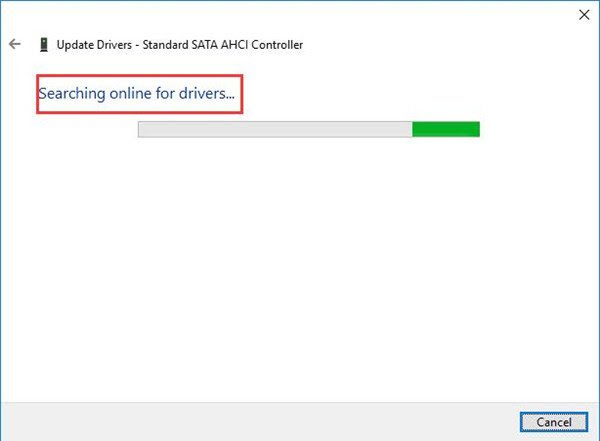
- Windows 10 will searches for the updated driver for your PC online, and update it automatically.
Method #3. Update it using a driver updater software
You can use any one of the many driver updater softwares available and do a quick scan of your computer to find the outdated drivers. The software would prompt you to do a quick scan of your compicom for any outdated drivers.
After the software completes scan it will ask your permission to download the software automatically for you. This method is easier and rather hassle free. It just cannot get any easier. You can use the Driver Booster software to update your software in an effective and efficient manner.
Final Take !
I hope that you were able to get understand how to update Standard SATA AHCI Controller on your Lenovo, HP, Dell or Asus laptop. In case if you face any difficulty, please feel free to comment and let us know. We will get back to you as soon as possible.
I hope you found the article informative and enjoyed reading it. This is all for the day. Thanks for reading!
