Wireless connections are fast and simple to set up and use. However, I and a lot of users still find the wired connections a lot more reliable, stable and comfortable. Sometimes, you might face issues while using wired connections even though when your Wifi connections are working absolutely fine. This could be real trouble for users who prefer Ethernet connections over Wifi. In this post, we will discuss the Ethernet not working problem in Windows 10 computers and laptops.
I will provide all the base information related to the issue, and also How to fix Ethernet not working issue in Windows 10.

Problem: Ethernet not working in Windows 10
For those users who work on Ethernet connections, this problem is none less than a disaster. Ethernet not working is a common issue among the Windows 10 users working on the latest updates, for example, Windows 10 Fall Creators update.
While booting from the latest update, No Internet, secured or no WiFi available problems are also very common along with the Ethernet not working problem.

The computer might suggest that there is a problem with the network while you are suffering from the issue, but there is NOT. The problem is 99 out of 100 times not lies in the network. The cause for Ethernet not working is most probably either cable, hardware or software related. In order to fix Ethernet not working error, you are required to deal with these shortcomings. I will guide you HOW.
How to Fix Ethernet not working Error Windows 10
There could be various reasons as to why the Ethernet not working issue is residing on your computer. Based on these reasons, you should take the actions. You first have to try the common solutions that work for most of the users. If those work, you can enjoy using your Ethernet connection without having to continue reading this post. If those don’t work out in your case, you have to continue reading the post until you solve the Ethernet not working problem and get back your connection running again.
1. Turn off Wifi

If you have got a working Wifi connection but a problematic Ethernet connection, you should consider turning Wifi off in order to solve the Ethernet not working issue. If Windows has access to both of them, it will give top priority to ethernet, but display the Wi-Fi icon in the notification area. Right-click on the icon, click on Open Network and Internet Settings, then the Wi-Fi tab, and toggle Off. This should solve the problem.
2. Enable Ethernet Connection

In the same Network and Internet Settings section that you visited in the 1st Method, check if Ethernet is enabled. Find the correct network. It will probably say Local Area Connection. If you find Not connected written below the name, right-click it and select Enable. It may take a few seconds for the connection to start working properly, but not more than that. This should fix the Ethernet not working problem.
3. Use different port

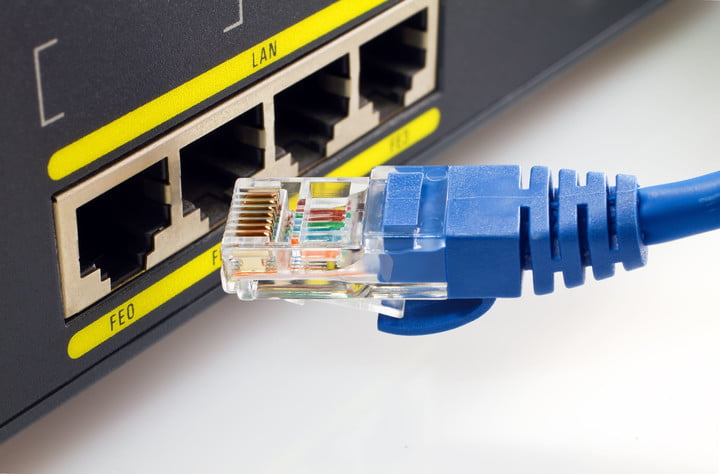
There are chances that the port you are using is defective and causing Ethernet not working issue. In order to check this, plug the cable in a different port of the router. If your Ethernet connection starts working properly after doing so, you have a defective port which you can get repaired later. If the connection still isn’t working, the port is fine and the problem is with something else.
4. Use different cable

If your port if fine but you are still experiencing the Ethernet not working issue, there are good chances that the problem is with the cable you are using. To check this, borrow or bring a different cable and use it. If the connection gets going now, the cable you were using earlier was defective and you should use the new cable. If the connection is still not working, your cable was fine too but the problem is somewhere else.
5. Turn Off Firewall or Antivirus (Temporarily)

Sometimes Windows Firewall, Defender or other antivirus software block the Ethernet connection. To check this, you should turn them Off temporarily and check if your connection gets going afterward. If it does, you can again Turn On the Firewall and antivirus and check if they are blocking the connection again or not. If these were not causing Ethernet not working issue, just turn them On and scroll down.
6. Enable Ethernet Device
After trying all the common solutions presented above, if you are still facing the issue, you should follow the steps below in order to resolve the Ethernet not working issue:
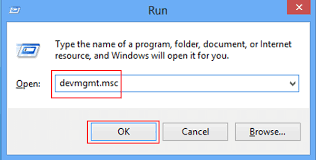
Step-1: Press the Windows + R key together to trigger the Run dialog box. Type devmgmt.msc in it and hit Enter. Device Manager will open.

Step-2: In the Device Manager, expand the Network adapters category.
Step-3: Check if you see a computer icon with a downward facing arrow next to your Ethernet card device name. This suggests the Ethernet is disabled.

Step-4: Right-click on the Device name and select Enable.

This should solve the problem.
7. Update Drivers
Outdated or corrupt drivers often cause the Ethernet not working issue. In order to fix this, you should update the device drivers. Follow these steps in order to resolve the issue:
Step-1: Press the Windows + R key together to trigger the Run dialog box. Type devmgmt.msc in it and hit Enter. Device Manager will open.

Step-2: In the Device Manager, expand the Network adapters category.
Step-3: Right-click on the ethernet adapter(device) name and select Uninstall.

Note: Ethernet adapter is the one without Wi-Fi or wireless in its name.
Step-4: Restart your computer to re-install the drivers.
This should update the drivers and eventually solve the problem. You can also use third-party software to update drivers in an easier manner.
Conclusion
Ethernet not working is a common issue among the Windows 10 users. This issue can happen due to several reasons. These were the Top 7 Ways to resolve the issue. You can also visit the official Microsoft thread related to this problem for further help.
For any queries, doubts or suggestions, feel free to visit the Comments section. Hope I helped you to figure everything out. Have a nice day, Folks!
