Updating is an essential aspect of any system as the updates are provided for improvisation in the performance and security of the whole system. However, sometimes these updates may bring some problems with them. Microphone not working in Windows 10 is one such problem, which came along with the recent update of Windows.
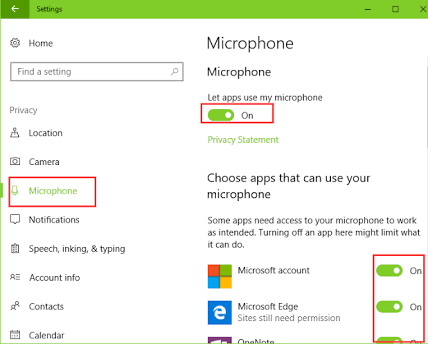
When some users updated the Windows Operating System of their laptops, they experienced this issue of internal microphone not working. They didn’t know how to do the mic test to solve the problem. In case, you are facing the same issue. Don’t worry, we have got you covered here. In this article, I will explain you the 3 Best Methods to Solve the Microphone Not Working Problem in Windows 10.
Causes for the Microphone Not Working Problem
There may be varying reasons for different brands of laptops. We will put light on the major ones only in order to understand the issue. This will help us to realize and resolve the issue swiftly and quickly. Here are the major causes:
● Corrupted, outdated, broken or incorrectly configured device drivers.
● Incorrectly set microphone settings.
● Certain hardware problems.
● Virus or malware messing with the audio utilities.
● Inner fault in the laptop.
These were the 5 major reasons for the Microphone not working problem in Windows 10 laptops. If the causing agent in your case is any of the first four causes, we will surely solve your problem. In case if there is a fault in some inner part of your laptop, then you might need to contact the service centre.
3 Method to Fix Microphone Not Working Problem in Windows 10
We are providing you the 3 very simple and easy methods to solve the internal microphone not working problem in Windows 10. You can try any of them randomly or you can try them all one by one in case if just one doesn’t work out for you.
1. Update the Device Drivers
In case the drivers installed in your laptop are creating a conflict leading to internal microphone not working, this method will help you. You can update the drivers either by yourself or by a third-party software, I will tell about the first one coupled with the second one too.Follow the steps mentioned below in order to fix the errors in the device drivers:
Part-1 Update by Yourself
Step-1.1: Go to the Search Bar and then type “Device Manager” in it to access the “Device Manager”.
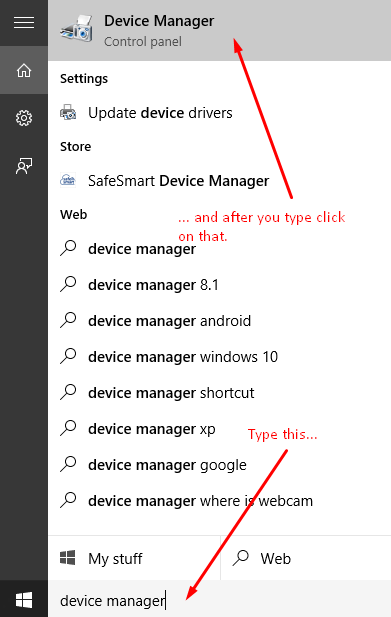
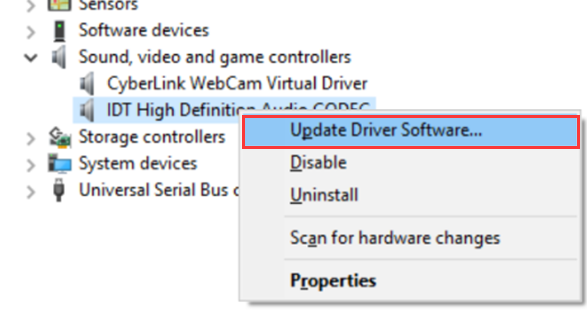
Step-1.2: After opening the Device Manager, expand the “Sound, video and game controllers” category.
Step-1.3: Now Right-click on “IDT High Definition Audio CODEC” and then click on the “Update Driver Software…” option present in the context menu.
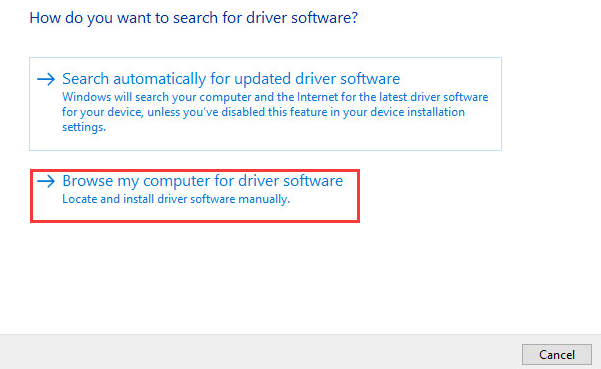
Step-1.4: Afterwards, click on the “Browse my computer for driver software” option present on your screen.
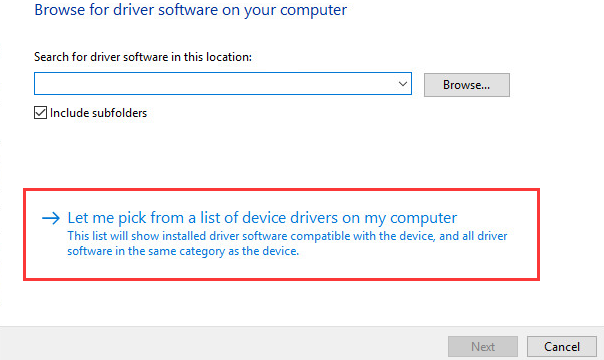
Step-1.5: Then, click on “Let me pickup a list of device drivers on my computer” option.
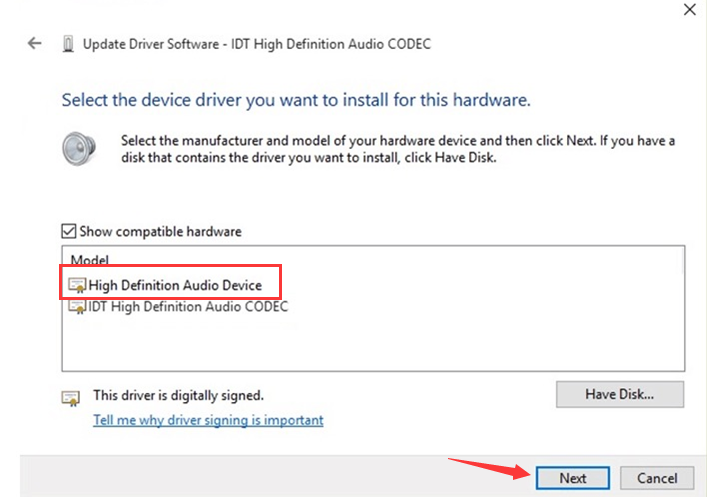
Step-1.6: Finally, select “High Definition Audio Device” (Not IDT High Definition Audio CODEC) and then click on the “Next” button. A warning message may pop up, simply click on the Yes button.
Step-1.7: Wait patiently till the drivers get installed and then restart your laptop.
Part-2 Update using Driver Talent
Step-2.1: Download and install the Driver Talent from here.
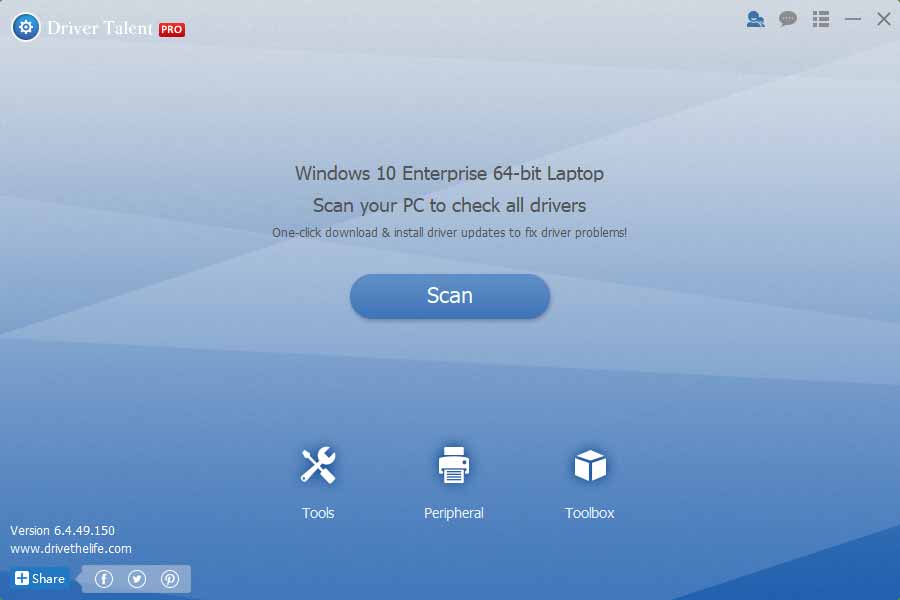
Step-2.2: Open Driver Talent, click on the “Scan” button and let it detect the drivers to find the problematic ones.
Step-2.3: After the scanning is completed, you will see a list of drivers that need to be repaired or updated. Click on the “Uninstall” button next to them.
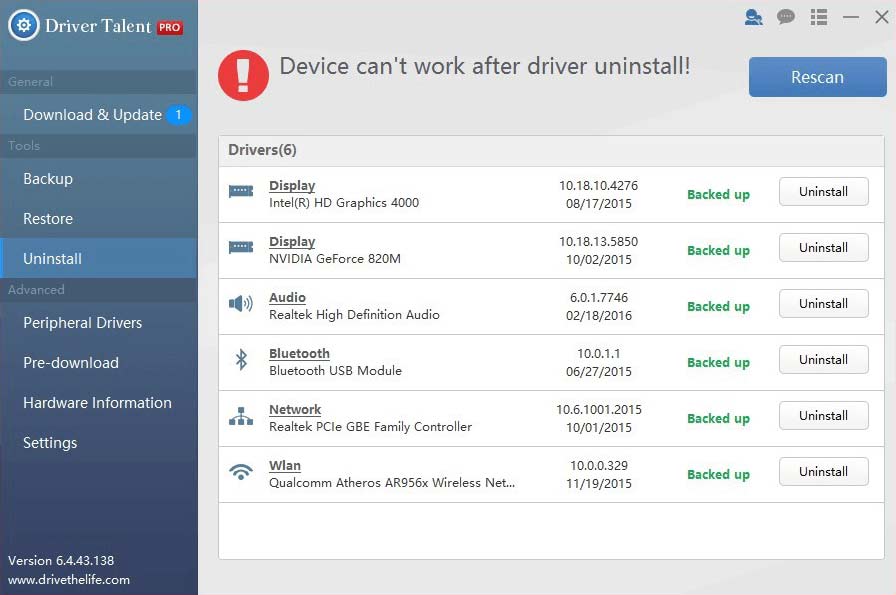
Step-2.4: Now click on the “Repair” or “Update” button and wait till all the issues are resolved.
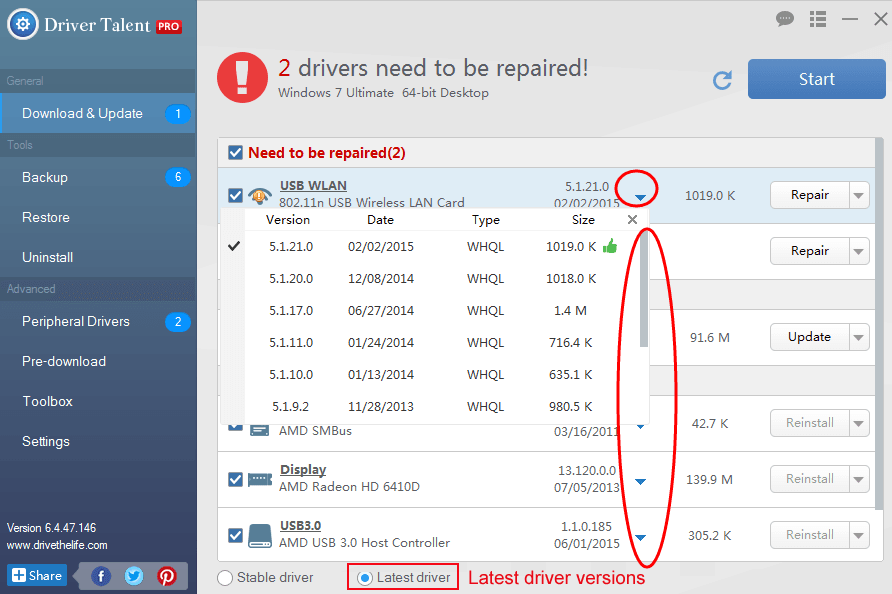
Step-2.5: Restart your laptop.
Part-3 Update using Driver Easy
Step-3.1: Download and install Driver Easy from here.
Step-3.2: Run Driver Easy and click on the “Scan Now” button present on your screen to let it inspect the drivers.

Step-3.3: A list will appear after the scanning is completed. Now click on the “Update” button present next to “IDT High Definition Audio CODEC.” You can update other drivers too in the same manner.
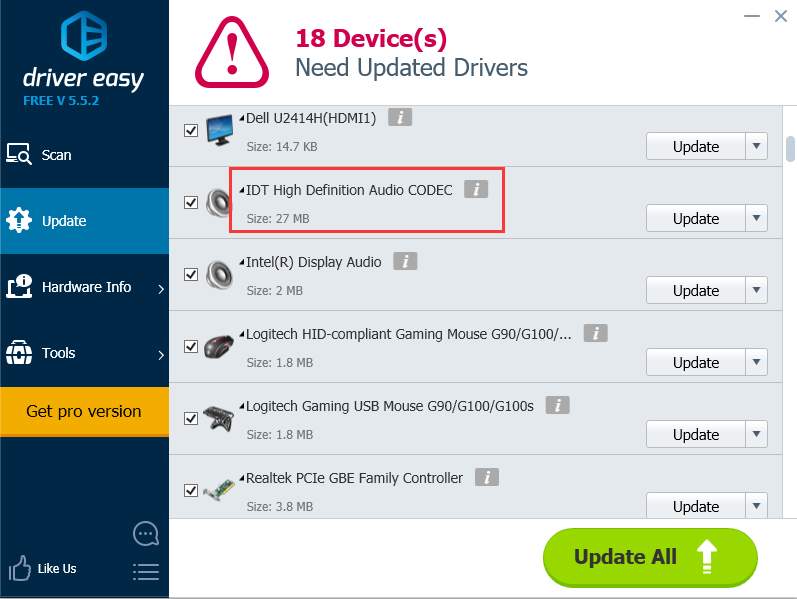
Step-3.4: Restart your laptop.
Done. This must have solved your microphone not working problem in Windows 10. If the problem still persists, move down to the next method.
2. Set Microphone as Default
This method will work for you if an interference caused in the settings changed the default microphone of your system. Follow these simple steps:
Step-1: First, right-click on the Speaker icon present at the the bottom right corner of your screen. A context menu will appear.
![]()
Step-2: In the context menu, click on “Recording devices.” The “Sound” dialog box will appear.

Step-3: In the “Sound” dialog box, switch to the “Recording” tab. Then check if the Microphone is set as default. If it is, skip to the next method. If it isn’t, click on “Set Default” button.

Step-4: Now click on “Ok” and then on “Apply.”
This is it. You have successfully completed the procedure. This might have resolved the issue. If it is still unsolved, scroll to the next method.
3. Check the Settings
If incorrect settings are causing the Microphone not working problem in your system, this method is will ultimately work for you. Here are the steps required to be followed:
Step-1: Firstly, right-click on the Speaker icon present at the bottom right corner of your screen. This will invoke a context menu.
![]()
Step-2: In the context menu that popped up, click on “Recording devices.” This will open the “Sound” dialog box.

Step-3: In the “Sound” dialog box, click on the “Properties” button.

Step-4: Now switch to the “Levels” tab. In the “Levels” tab, set the “Microphone” and “Microphone Boost” to maximum by sliding them to the right.
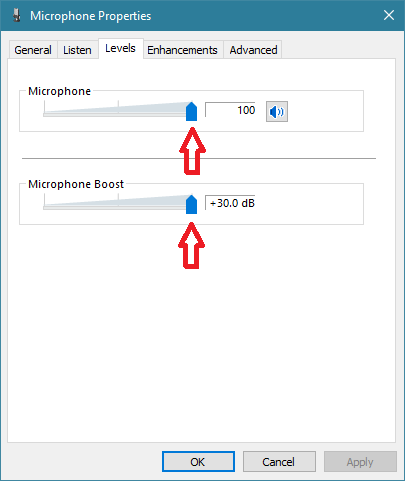
Step-5: Afterwards, switch to the “Enhancements” tab. Here, make sure to Uncheck the ““Disable all sound effects” box.

Step-6: Then, switch to the “Advanced” tab and Uncheck the “Allow applications to take exclusive control of this device” box. After doing so, click on “Ok” and “Apply.”

Step-7: Now go back to the “Sound” dialog box and switch to “Communications” tab. Here, select the “Do nothing” option, click on “Ok” and then “Apply.”
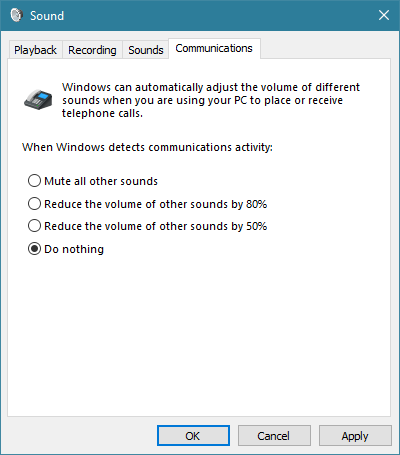
Step-8: Restart your laptop.
That’s it. These were the settings needed to be checked in order to resolve the microphone not working issue. You have successfully solved the problem now.
Conclusion
These were the 3 best methods to solve the microphone not working problem in Windows 10. If somehow, you are still facing the issue, I would recommend you to either do a “Full Scan” of your system using an Anti-virus programme, or you can also try Windows Troubleshooting by following this route: Control Panel-> Troubleshoot-> Hardware and Sound-> Troubleshoot audio recording->Next. These will probably help you. In case if these also failed, you should definitely contact the Service Centre without delay.
Hope we helped you in finding what you were searching for. If you have any queries regarding the topic, comment down in the comment section below. Have a nice day, folks !
