In this article, we will take you through different methods and steps that you have to follow to change the primary monitor on Windows 10.
But before you start to work with these steps, you need to know what a primary monitor is and why do we use dual or multi-monitor mode in our Windows system.
What is A Primary Monitor?
The Windows operating systems are currently supported and maintained by Microsoft. A monitor is an output device that is used to display the output. All the versions of the Windows operating system allow the dual monitor mode and some of them allow multiple monitor mode.
The concept of the primary and secondary monitor comes into action when dual or multiple monitor modes are operated. Windows 10 not only supports dual monitor but it also supports multiple monitors.
When two or more monitors are connected to the Windows system, Windows sets one of the monitors as primary and the other monitors as secondary, tertiary, quaternary, and so on.
The primary monitor also is known as the main monitor of the system is usually considered as the one that is first connected to the system. The other monitors are then assigned in order.
Why Primary Monitor?
Before we head on to the steps for changing the primary monitor, you must know why have we the concept of dual/multiple monitors in Windows. The primary monitor is used to when dual/multiple graphic cards are used and we have multiple monitors. When these monitors are employed to display the output in unity or together, we use the primary monitors. The primary monitor is the one that has the start button on it.
Determining which monitor to use as a primary monitor is extremely important because all the outputs are displayed on it and the start button is also present on it. The primary monitor controls the rest of the monitors. If an application is opened on the secondary or other monitors, it pops up only on the primary monitor. The primary monitor is, therefore, the control monitor in a dual/multi-monitor system.
Now that we are aware of the needs of the dual/multi-monitor system and their uses, we should also know one of the greatest tasks is to choose the primary monitor. All the control flow and the efficiency of our system depends on which primary monitor do we choose.
Let us now explore the steps to change the primary monitor in Windows 10.
How To Change Primary Monitor?
You now know how crucial the choice of Primary Monitors is. The default primary monitor in Windows 10 is usually the monitor that is connected first. It is very often that we don’t want the default primary monitor to control the flow of action. You sometimes want a secondary and tertiary monitor to control the actions of the system. This means that you want to replace the primary monitor with a secondary monitor or you simply want to change the primary monitor.
Following are the steps to change the primary monitor in Windows 10, 8 operating system:
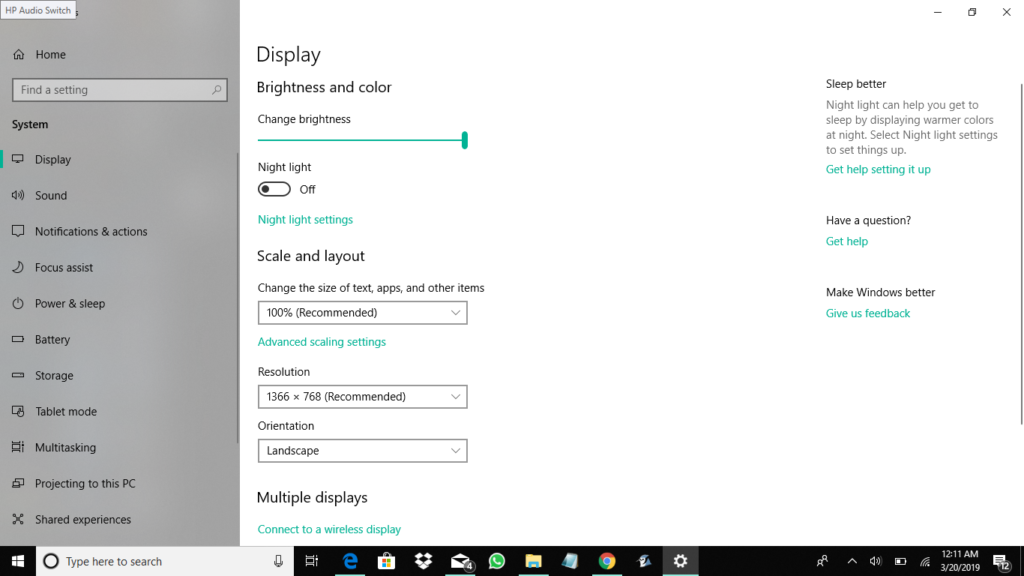
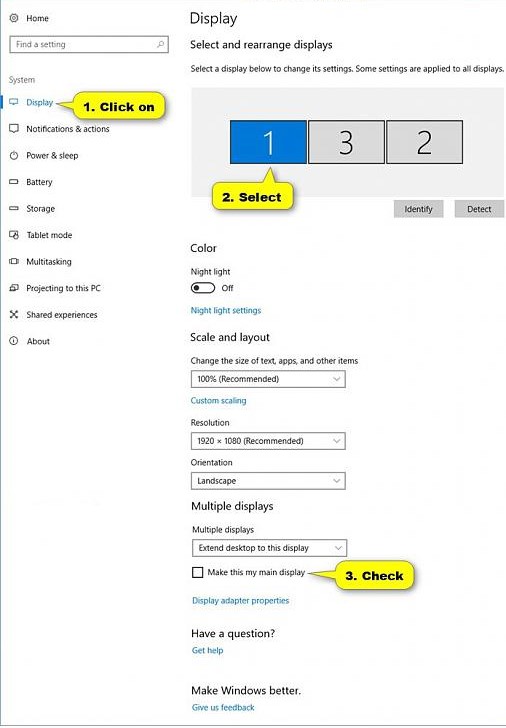
STEP 1: Right-click anywhere on the desktop and select “Display Settings” (OR) Open “Settings” and click on
“System”(icon)


STEP 2: In the display dialog box, all the screens are available in the form of numerics or numbers. Select the monitor that you want to select as your main screen or primary screen. Next, tick the box next to “Make this my main display”.

NOTE: If the “make this my main display” option is greyed out, it means that the monitor that you want to set as your primary monitor is already your primary monitor.
STEP 4: You are done setting the desired monitor as your primary monitor. Now you are done. Click on “Close”. The “settings” dialog box will close.
Final Words
Congratulations you have set your desired monitor as the main monitor or the primary monitor. Now, this monitor will control all the flow of actions of your Windows system and the networks between different monitors.
Make sure to apply the steps carefully and always when you set up your Windows system in dual/multi-monitor mode.
