Modern Setup Host errors are very common among Windows 10, 8 and 7 users. If you are also facing high cpu/disk usage due to modern setup host then this article is for you. You can also learn more about it at thelinkshop.com
There is no need to worry at all. We have got you covered. Find out answers to all your Modern Setup Host high cpu usage issues along with ways to disable Modern Setup Host. Before moving forward with the types of Modern Setup Hos‘ errors and methods to them, let us first understand what it is actually. In case you are just interested in the method itself, feel free to skip this part straight to the ‘how to’ section.
What is Modern Setup Host?
Modern Setup Host or SetupHost.exe is is a self-extracting archive and installer. It is located in C:\$Windows.~BT\Sources\ folder and runs as a scheduled task every time a user logs in to execute a process with the local user’s privileges within the context of its parent windowsstoresetupbox.exe.
What are the different kinds of Modern Setup Host errors?
There are two general errors which we face are;
- Modern Setup Host has stopped working
- Modern Setup Host high CPU usage
In this article we are going to cover both these errors in detail and describe methods to fix them.
Modern Setup Host has stopped working Error
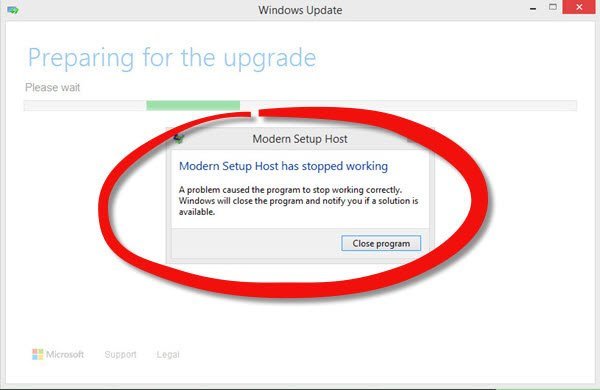
Modern Setup Host is required when we try to run the setup to upgrade your PC to Windows 10. We see this error when the Modern Setup Host fails. This stops the upgrade process.
Warning: Before moving forward with the method to fix this issue lets look at some precautions.
- If any 3rd party antivirus is installed on your computer or your firewall sofware is on, disable it.
- Disconnect all the unnecessary external devices if any, connected to the computer.
- Ensure that you have sufficient Disk Space. At least 20GB disk space is necessary.
How to fix Modern Setup Host stopped working error?
Try out methods from the list below to fix the Modern Setup Host has stopped working error:
1. Perform a Clean Boot
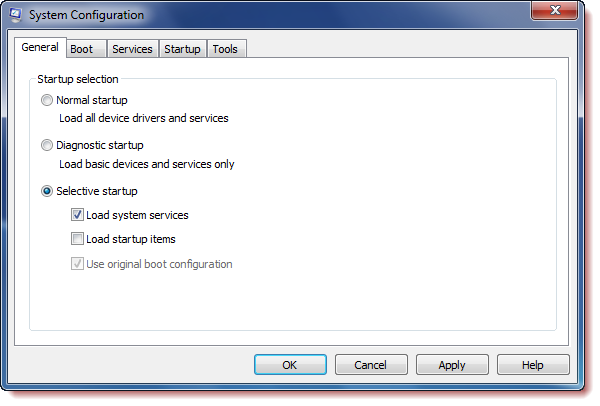
- Type msconfig in start search and hit Enter.
- Click the General tab, and then click Selective Startup.
- Uncheck the Load Startup Items check box.
- Ensure that Load System Servicesand Use Original boot configuration are checked.
- Click the Services tab.
- Select the Hide All Microsoft Services check box.
- Now click Disable all.
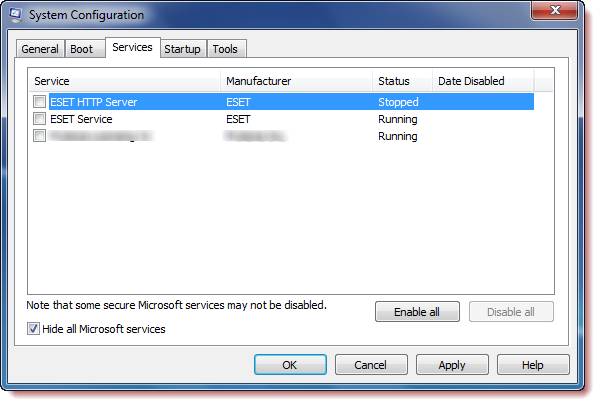
- Click Apply/OK
- Restart the computer.
This should put Windows into a Clean Boot State.
2. Change the Language Settings
Change Language to English (United States) and set a match Windows display language, including System Locale to English (United States).
3. Use Command prompt
- From the WinX Menu, select Run. Type the following path and hit Enter:
C\Windows\SoftwareDistribution\Download
- Select all the contents and delete everything in this folder.
- Next, from the WiX Menu, click on Command Prompt (Admin), type the following command and hit Enter:
wuauclt.exe /updatenow
- Restart your computer
- Start the upgrade process again.
Modern Setup Host high CPU usage Problem
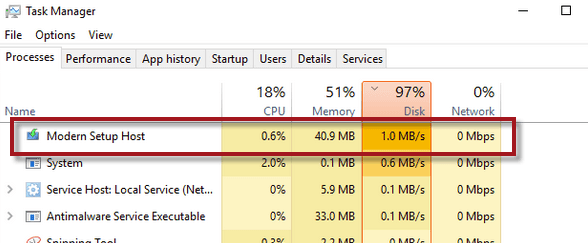
If you have noticed that Modern Setup Host or SetupHost.exe is listed on your Task Manager and as it appears, has been using a lot of CPU disk space, then read along to find a solution to this problem.
Why is Modern Setup Host showing on your Task Manager?
The reason why it is listed on the Task Manager can be because Modern Setup Host has suddenly started to run itself, causing high CPU usage and high disk usage (which can be as high as 100% constantly as long as the process is running).
In turn this slows down whatever you were doing. Even if the Modern Setup Host starts itself unnaturally it usually terminates automatically after completing whatever installation and upgradation work it was doing. But if it’s still there, running in the background even after several minutes, we have a problem at our hands.
How to fix Modern Setup Host high CPU usage
1. Kill the process from the Task Manager
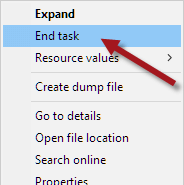
Kill the process now by selecting Modern Setup Host or setuphost.exe from the Task Manager and click on End Task.
This will immediately kill the process. And it will remain off until your next restart.
2. Check for Windows Update error.
To run the DISM command perform the following steps:
- Go to start menu.
- Search for command prompt.
- Right-click it and select Run as administrator.
- In the elevated command prompt, enter the following command followed by Enter key.
Dism /Online /Cleanup-Image /RestoreHealth
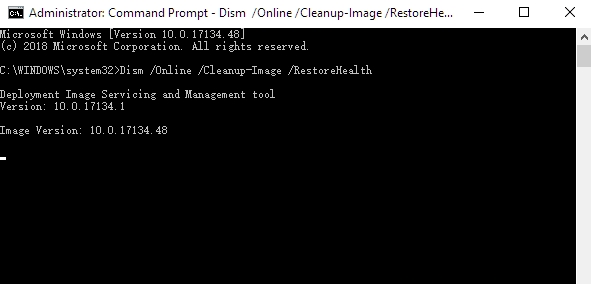
Deployment Imaging and Servicing Management (DISM) is a Windows built-in tool. It is used to automatically replace files and correct services problems, particularly Windows Update problems, for your Windows 10 image.
3. Disable Windows Update or Modern Setup Host
We do not recommend using this method as Windows would not be able to update itself automatically once you do so. However you can always turn it back.on.
- Press Win+R keys to open Run window.
- Type services.msc
- Click on OK.
- In the Services window, look for the service called Windows Update.
- Select Windows Update service.
- Under Startup type, choose Disabled.
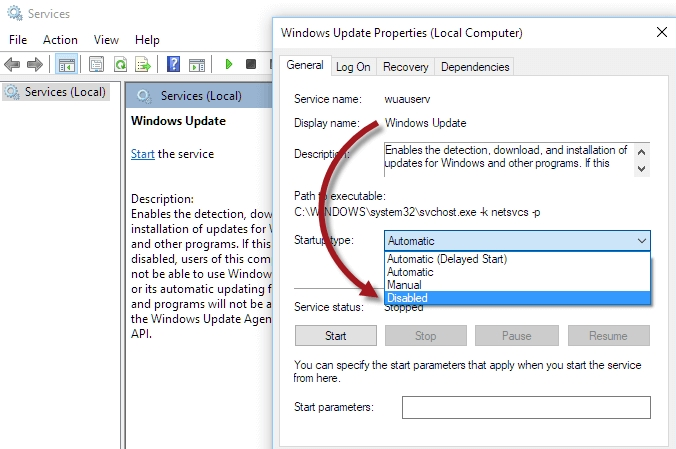
- Restart your Personal Computer.
Final Take!
I hope that you were able to solve all your Modern Setup Host related issues. In case if you face any difficulty, please feel free to comment and let us know. We will get back to you as soon as possible.
