Just like us humans, Windows too have their own priorities. You may think that you are only using a single software on your desktop but it actually is running a number of processes in the background. All of them are set to different priorities as of when and how each should work. The best part is that we can adjust these in order to enhance the performance of the software that we wish to use. This is done by setting or changing CPU priority to prefer foreground apps. In this article, I will explain you 2 Working Methods to Set or Change CPU Priority to Prefer Foreground Apps.

All You Need to Know About CPU Priority
CPU Priority is basically the importance or power provided by the CPU to a Service or Program Running. If you ever had a look at the Task Manager, you know very well that how many Services and Programs are running all the time in a computer.
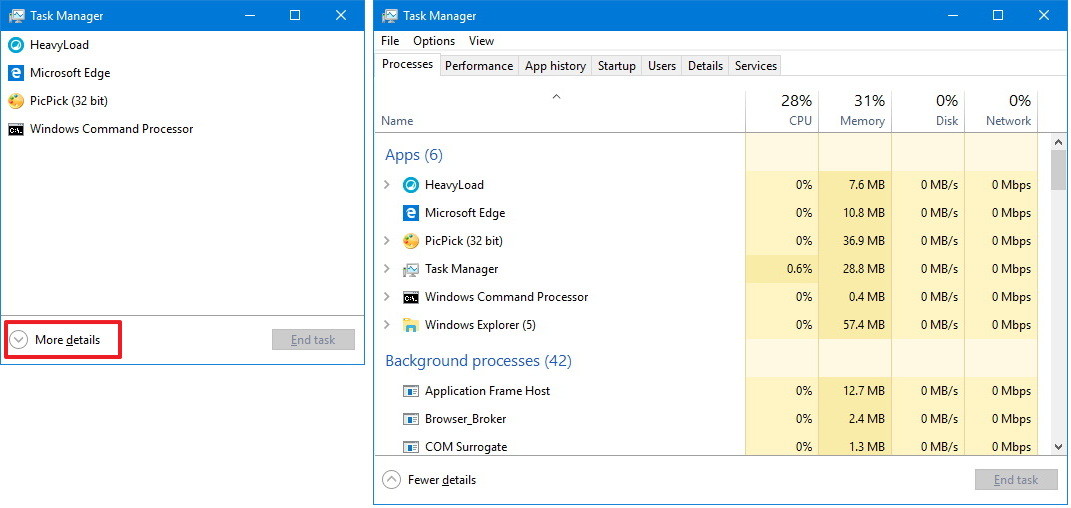
One may think that if he is running only a single software then he isn’t using much power of the CPU but actually, there are certain Programs and Services always running in the background consuming a lot of power. All of them are set to different priorities. Based on these priorities they start, work and stop. Fundamentally, there are seven types of priority levels, viz. Realtime, High, Above Normal, Normal, Below Normal, and Low. These priority levels are fixed based on certain factors like the amount of processor they consume and the time taken to run them. Higher the priority lever, higher the processor potential assigned to a Service. Priority levels make the operation of these Services and Programs smooth and easier.
With these methods that I’ll explain to change the CPU priority in Windows 10, we can assign the priority based on our wish. This will result in helping our favorite apps to work faster.
However, yo must remember one thing. This change is not permanent. Along with this, setting the CPU priority manually might create unwanted confusion among the processes. This happens because the processes which are important right now, won’t receive the same priority every time after you meddle with them. So, you must think before you act in this case.
Now let’s move further to the two simple methods to set CPU priority to prefer foreground apps in Windows 10.
How to Set CPU Priority to Prefer Foreground Apps
So here are 2 ways to set CPU priority to prefer foreground apps in Windows 10. You are not required to be a Computer Science expert in order to use these. Just follow the steps that I present to you carefully. They will lead you to the destination comfortable. Method-one will use Control Panel to adjust the CPU priority while method-two will use the Registry Editor. Both of them are easy and accurate.
1. Adjust CPU Priority Using Control Panel
This method will use Control Panel to adjust the CPU priority to prefer foreground apps. Before following the steps mentioned below, sign in to the Windows with Administrator or Administrator privileges account. Follow these steps:
Step-1: Firstly press Windows + X key simultaneously to open Quick Access menu and then go to Control Panel from the Menu.
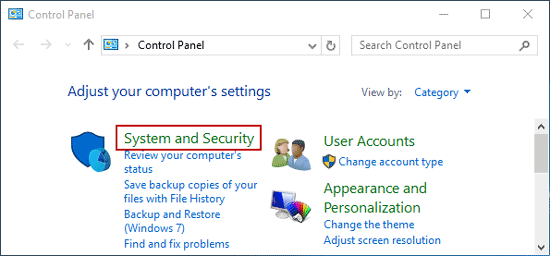
Step-2: Now go to “System and Security” option.
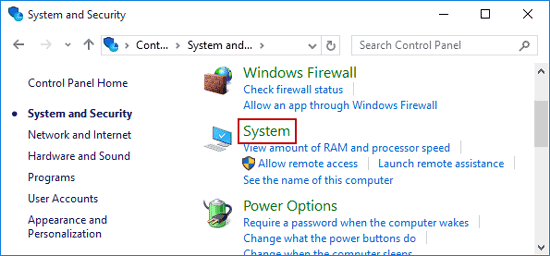
Step-3: Afterwards, click on System to access the settings.
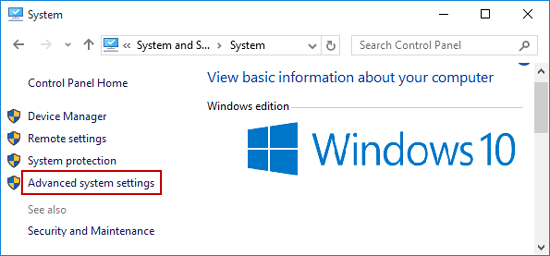
Step-4: Then click on Advanced system settings option in the left pane in the System window. This will open System Properties dialog.
Step-5: In the System Properties dialog box, switch to Advanced tab and then go to Settings… under the Performance category. A Performance Options dialog box will pop-up.
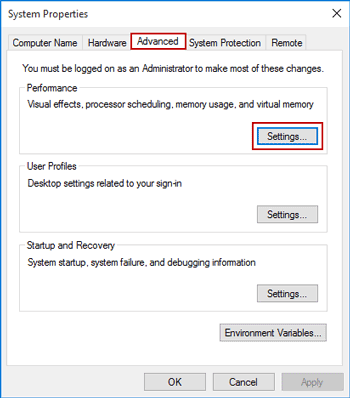
Step-6: In the Performance Options dialog, switch to Advanced tab again, and check mark the Programs circle under “Adjust for best performance of :“.

Step-7: Finally, click on Ok and then Apply to complete the procedure.
Done. This will adjust the CPU priority for the best performance of Programs. Most of the times, Windows is already set for this by default. In case your system wasn’t, you have learnt how to.
2. Adjust CPU Priority Using Registry Editor
This method will use Registry Editor to adjust the CPU priority by changing the DWORD value prefer the foreground apps. Follow these steps in order to learn how to:
Step-1: Press Windows + R key together to trigger the Run dialog box. Type regedit in it and hit Enter to open the Registry Editor.

Step-2: Now in the Registry Editor, navigate to the following Registry Key: HKEY_LOCAL_MACHINE\SYSTEM\CurrentControlSet\Control\PriorityControl
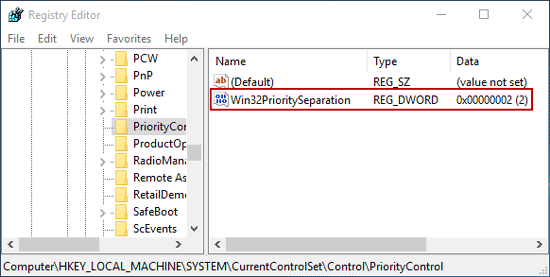
Point to Remember: This key defines the foreground vs. background priority differential. The possible default values for Win32PrioritySeparation are REG_DWORD 0, 1, or 2, which specify the priority to be given to the application running in the foreground.
Step-3: Afterwards, double click the Win32PrioritySeparation present in the right pane of Registry Editor. You will see its value data is 2 right-now.

If you want to adjust for the best performance of Windows for foreground apps, just change the Value data as 26.
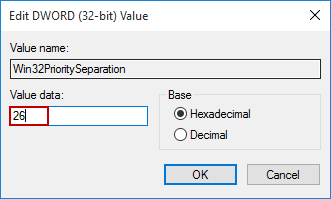
However, If you wish to adjust for best performance of Windows for background processes or services, you can set the Value data as 18.
Step-4: Then click on Ok and finish the procedure.
Done. You have successfully changed the DWORD value in the Registry Editor to set CPU priority to prefer foreground apps.
Summary
Setting or changing CPU priority is a good way to enhance the performance of our favored apps. There are two ways to set the CPU priority to prefer foreground apps. One is to use Control Panel. While the other use Registry Editor. You must have learned both of them by now. It is a nice way if you keep switching your CPU priority between Programs and Background Services based on what you are doing.
As the methods to change CPU priority are not very complex, Just make sure that you don’t create unnecessary confusion in the system. You can also go through the official Microsoft thread. Hope I helped you for what you arrived here.
For any queries or doubts regarding the topic, comment down in the Comments section below. Have a nice day, Folks!
