Minecraft is one of the most famous games out there with millions of players playing it. It was named the Best-selling video game ever in 2017. The main highlight of the game is that it depends on one’s imagination and strategy which is simply just more fun than leveling up in pointless games. But sometimes on systems with low memory spaces, Minecraft can turn out be a very choppy and laggy experience. In this article, we are going to learn about how to Allocate more RAM to Minecraft. Read along to find out!
Why would you want to Allocate more RAM to Minecraft Server?
Minecraft is a very simple-to-play game and it runs really well on most devices. But who said it couldn’t be better – especially if you have a PC with a lot of RAM in it. It is best to take advantage of. The issue with Minecraft is that, by default, it is only allocated 1GB of RAM – which is obviously not great if you’ve got 8- or 16GB of RAM in your PC.
Also, if the game is not running smoothly and lag-free, allocating more RAM to Minecraft may solve the problem.
How To Allocate More RAM to Minecraft?
Below are a few tried and tested methods which are guaranteed to help you allocate more RAM to Minecraft. All you need to do is follow these methods step-by-step and you should be good to go.
Method #1 Allocate More Ram to Minecraft through JVM
Open the menu on the Minecraft Launcher.

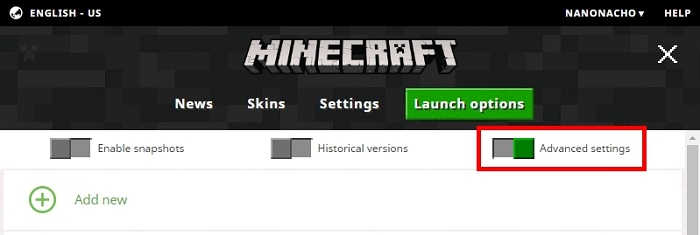
- Go to the ‘Launch options‘ tab.
- Switch Advance Settings ‘ON‘.
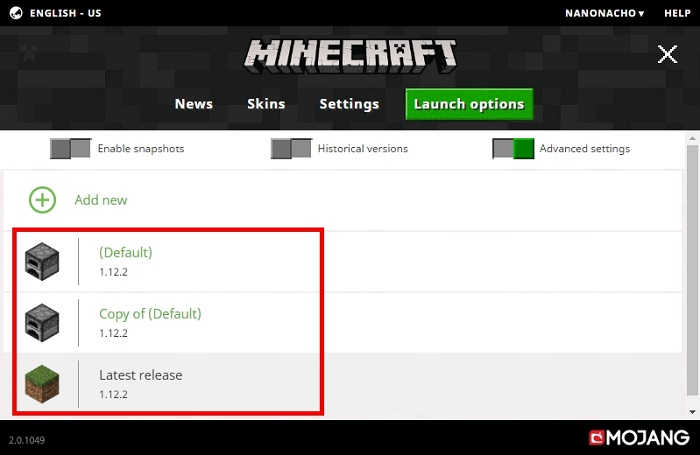
- Choose the profile to change the settings.
- From the settings menu, turn on the option ‘JVM Arguments’.
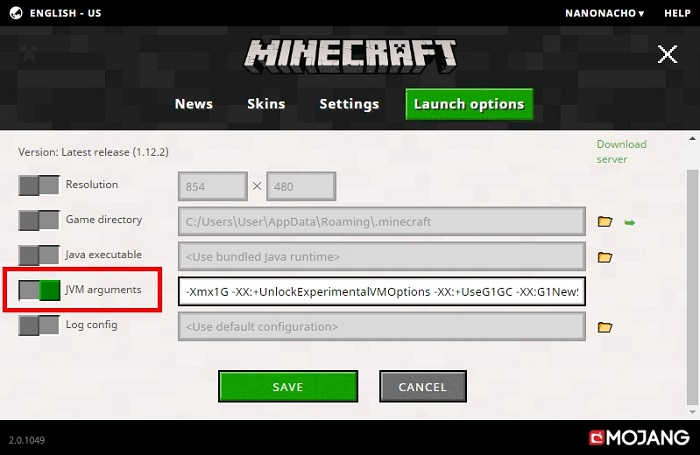
- The JVM Arguments option, the text field starts with ‘-Xmx1G‘.
Replace with the following as per requirement:
For 1GB — ‘-Xmx1G‘
For 2GB — ‘-Xmx2G‘
For 3GB — ‘-Xmx3G‘
And so on.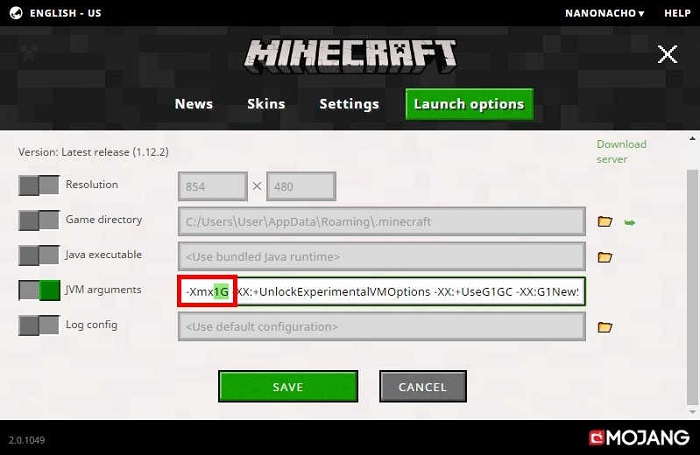
- Now press ‘SAVE‘.

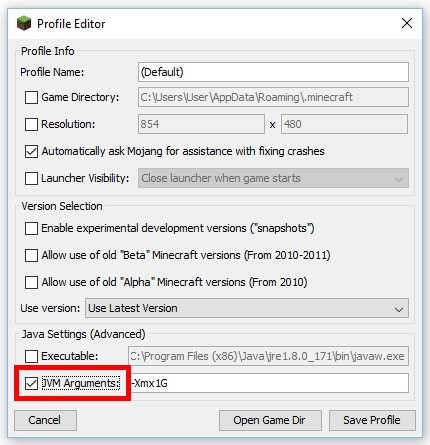
Method #2 Allocate More Memory to Minecraft Old Launcher ( Version 1.6 or lower)
- Select the ‘Edit Profile‘ option.
- Check the JVM Arguments option checkbox
- The JVM Arguments option, the text field starts with ‘-Xmx1G‘.
Replace with the following as per requirement:
For 1GB — ‘-Xmx1G‘
For 2GB — ‘-Xmx2G‘
For 3GB — ‘-Xmx3G‘
And so on. - Now press ‘Save Profile‘.
Method #3 Allocate More Ram to Minecraft Server
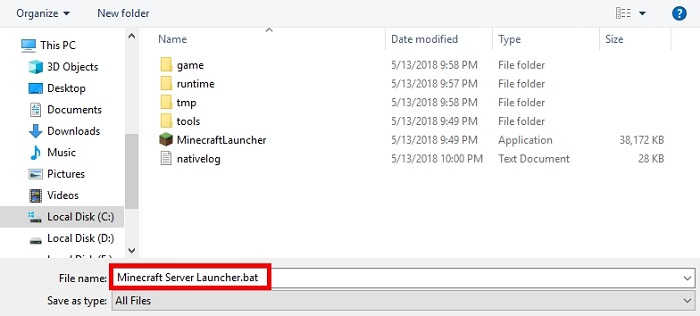
- Open the Minecraft Server Folder that contains ‘Minecraft_server.exe.’
- Create a new text file and type:
java -Xmx####M -Xms####M -exe Minecraft_Server.exe -o true
Replace ‘#’ with the following as per requirement:
For 1GB — 1048M
For 2GB — 2072M
For 4GB — 4096M
For 5GB — 5120M.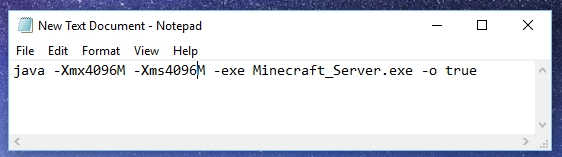
For MAC Operating System, type:
#!/bin/bash
cd “$( dirname “$0″ )”
java -Xms****M -Xmx****M -exe Minecraft_Server.exe -o true
(Use extension .bat & save file in server directory)
For Linux Operating System, type:
#!/bin/sh
BINDIR=$(dirname “$(readlink -fn “$0″)”)
cd “$BINDIR”
java -Xms****M -Xmx****M -exe Minecraft_Server.exe -o true
(Use extension .sh & save file in server directory)
- Run the newly created file
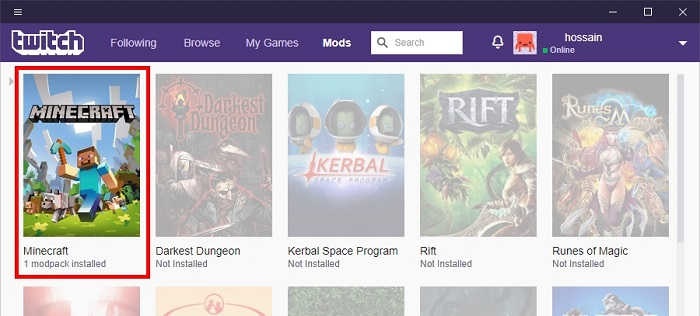
Method #4 Allocate More Ram to Minecraft Twitch Mods
- Launch the Twitch Application.
- Navigate to Twitch Mods section.
- Select Minecraft.
- Now, click on Mod Profile Picture.
- Open the 3 dots on the top-right corner.
- Choose ‘Profile options.’
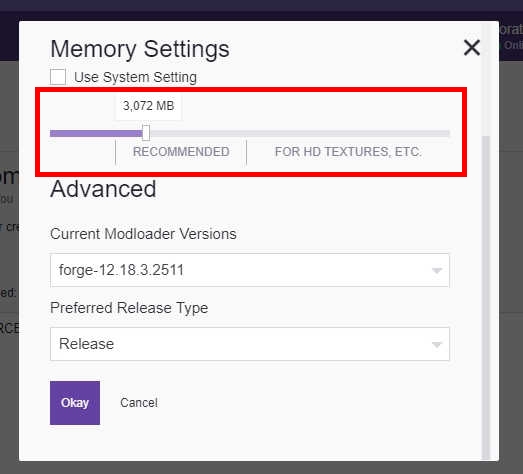
- In the option ‘Member Settings‘, uncheck ‘Use System Settings’ box.
- Use slider to modify RAM allocation.
- Then, press ‘OK’.
Method #5 Allocate More Ram to Minecraft Technic Launcher
- Update to the latest Java version available.
- Now, start Technic Launcher.
- Go To ‘Launcher Options‘.
- Click on ‘Java Settings‘.

- Then Click on the newly downloaded version.
- Change the RAM allocation from the drop-down menu.
Final Take!
I hope that you were able to Allocate More RAM to Minecraft from your device. We added methods to Add more RAM to Minecraft on Mac, Twitch and obviously Windows. If you face any difficulty, please feel free to comment and let us know. We will get back to you as soon as possible.