One fine day, you decided to privately watch a movie, series or play your favorite game. For that purpose, you put your headphones on and after connecting it to the port, a message pops up saying “Windows 10 won’t recognize this device”. Frustrating enough, isn’t it? Don’t worry because I will guide you through 5 different ways to fix the issue of headphone jack not working in Windows 10, 8, 7.
Reasons for Audio jack not working
There can be many reasons that can lead to your headphone jack to not work properly. Some of the most common reasons are;
- Windows update
- Software corruption
- Outdated audio drivers
- Hardware Failures
Find the real issue behind Headphones not working in Windows 10
In order to diagnose the source of headphone jack not working issue, try connecting these headphones to different computers or PCs. If they work pretty well on the others and just signaling the error message only on yours, it seems like there is an issue with the software.
But if they don’t work on other machines, it is more likely to be a hardware issue.
Once you find out the source of the problem it comes out to be fast and easy to troubleshoot the problem because of eliminating irrelevant sources.
How to fix headphone jack not working Problem
There are many solutions corresponding to the above reasons. Follow them one by one to and by the end of this article you will surely get your headphone back into the working state.
1. Basic Audio Jack troubleshooting steps
Sometimes we miss out the most common errors to which we don’t pay any attention because they seem too silly. But these common faults should be trouble-shooted before trying the next steps in order to save time and energy.
These basic troubleshooting methods involve:
-
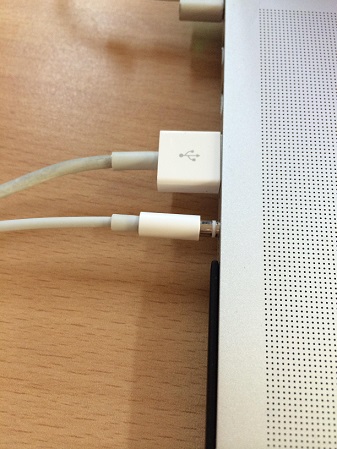
Check connections
First of all, check if the 3.5mm headphone connector is connected properly into its jack. Also, check for wear and tear in your wire which is also a prime reason for headphones not emitting any sound.
-
Check Volume
See if the System volume, headphone volume and application volume are not muted by entering into Volume Mixer by Right-click on the Speaker icon in the bottom right of windows taskbar and selecting Volume Mixer.
- Try the Windows audio troubleshooter
You can use the Windows audio troubleshooter to resolve this issue with your headphones. Just simply Right-click the Speaker icon and click Troubleshoot Sound Problems. Windows will automatically detect the problems and will guide you through the solution.

2. Set Headphone as the default audio device
When you connect the headphone make sure it is the Default audio device selected or else you won’t hear any sound from your headphones. And to check and set manually it as a default audio device follow the procedure :
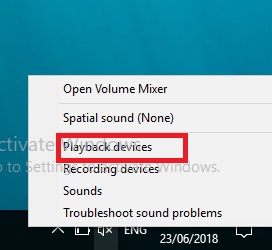
- Right-click over the Speaker symbol in the bottom-right corner of Window’s taskbar.
- Select Playback Devices from the popup menu.
- In the Playback tab, Right-click in the Empty space and check on Show Disabled Device.
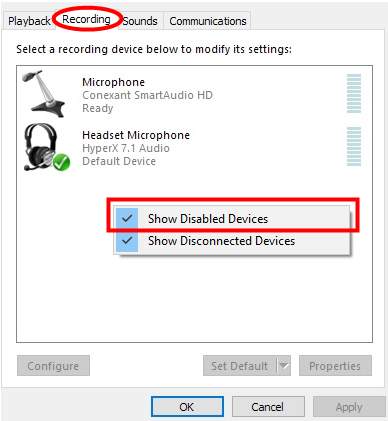
- Finally, Right-click on your headphones and select Enable and Set as Default Device.
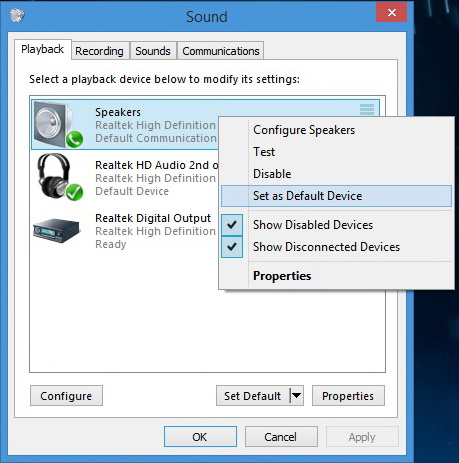
- Your headphone is now Default audio device.
After enabling the headphones and setting them to Default the problem must be gone by now. If it still persists follow the next methods.
3: Update your audio drivers
There is a huge possibility that the audio drivers are not functioning well.
Thus, unable to maintain a synch between hardware and software. Thus manually updating the drivers might fetch you out of this whole Headphone Jack not working issue. To manually update your Audio drivers follow step 1 and 2 from Method 2:
- Same as Method 2 step 1.
- Same as Method 2 step 2.
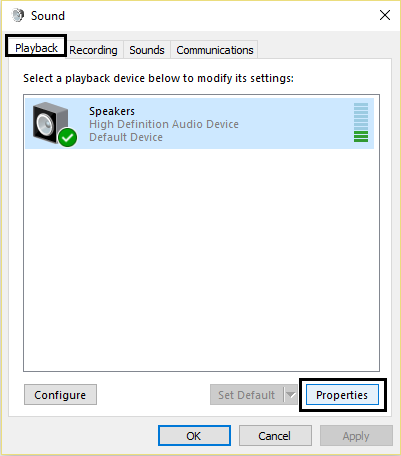
- In the Playback Tab, Select your Headset and tap on Properties.
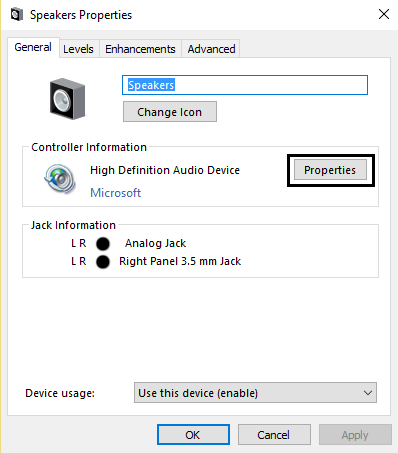
- In the Controller Information, click on Properties button.
- Click Change Settings.
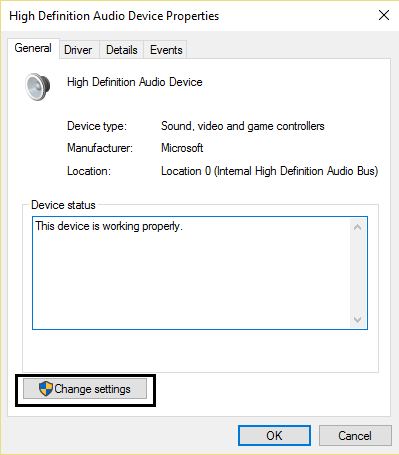
- Grant access for administrator’s permission.
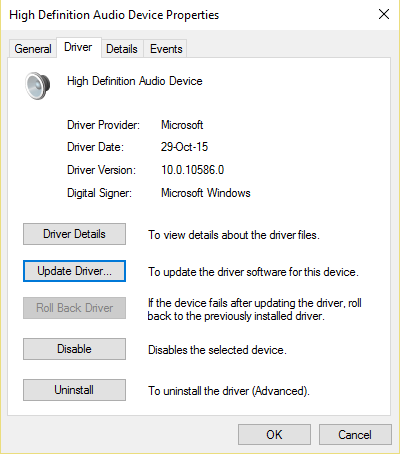
- Switch to Driver tab.
- Click on Update Driver.
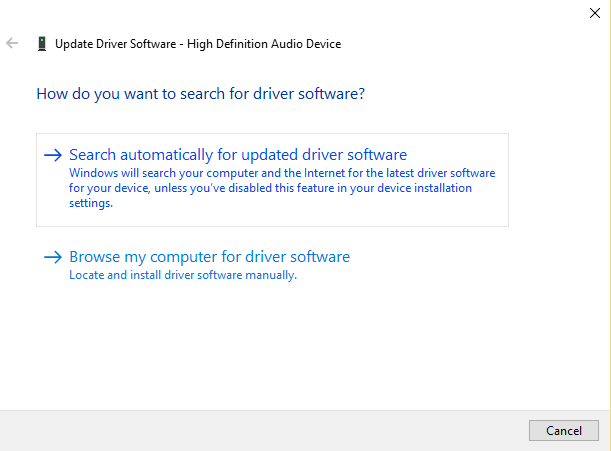
- Select Download the Updates automatically. This will select the latest Update and download it automatically.
- Restart your PC and now connect the headphones.
Updating the device drivers is not your headache anymore. To update the drivers quickly, accurately and without having any advanced technical knowledge try out this TweakBit Driver Updater which will assist you in finding and updating required drivers automatically.
Alternatively, you can also choose to Rollback your drivers to a previous state when your headphones were at a working condition. Hope you are able to hear the pleasant music from your favorite headphones.
4. Disable Front Panel Jack Detection
This is a simple solution to the problem where your windows throw an error saying “Windows 10 won’t recognize this device”. This issue generally arises after updating Windows.
Every system has a Realtek Audio system installed on it. So if you have this software follow these simple steps to disable Front panel jack detection:
- First of all, find the Realtek HD Audio Manager on your PC and Open it.
- Tap on the small Folder icon in the upper-right corner.

- Check Disable front panel jack detection.

- Finally, tap on OK.
This solution works a many times as reported by many users.
Final Words
That’s it. I hope you were able to cope up with these methods and successfully solved your audio jack problem. If the headphone jack still doesn’t work then try connecting a different pair of headphones.
For the best gaming experience try out the HyperX cloud 2 headsets and if you are facing any problems with this one, you can visit on this page.
Consequently, you can also try to perform a fresh and clean installation of windows that will restore the proper drivers so there is no glitch left. If there are still any doubts lingering in your mind feel free to ask them out in the comments section below.
