Microsoft has pushed Windows 10 as the supreme operating system with redefined UI and adding many new features which have resulted in 600 million active users. Though highly popular, Windows 10 has some issues or bugs that have resulted in bitter user experience as reported by some users. The Brightness control not working in Windows 10 (even Windows 8 and 7 users face it) is reportedly an old issue with the new operating system and the problem is vendor independent i.e this problem has been observed in HP, Lenovo and other brands laptops irrespective of the system architecture[AMD or Intel].
This problem cannot be resolved by using Windows 10 Troubleshoot as it doesn’t detect any errors or issues.
If you have bought a new laptop with Windows 10 configuration and brightness controls are not working OR you have just updated your computer and the brightness cannot be adjusted. Do not strain your eyes, we have got the fix for your problem. No software installation required.
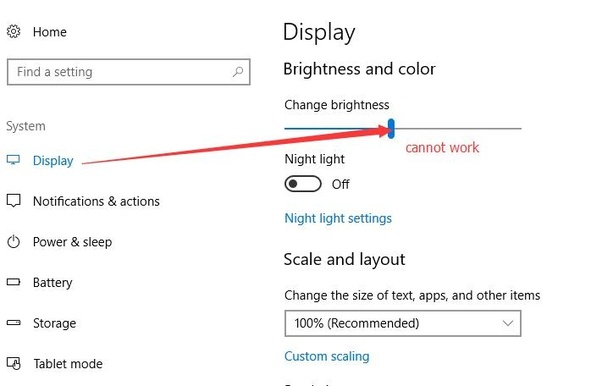
Just follow these simple steps listed below to resolve the brightness not working issue in your laptop.
Note that our fixes will help you fix brightness not working issues in Lenovo, Dell, HP, Acer and other common Laptop brands.
Prerequisites
Before proceeding further check the following requirements below:
[b.] Make sure your device is connected to power or has at least 50% battery.
How to Fix Windows 10 Brightness Not Working Issue
So here are 3 methods to fix Windows 10 Brightness Control Not Working problem.
Check Adaptive Brightness is Disabled
The adaptive brightness is an intelligent feature of Windows 10 can sometimes lead to a fixed brightness even if one adjusts the brightness. Just follow the steps to verify if this is the problem:
1. Right-click on the battery icon on the taskbar and click on ‘Adjust screen brightness’.
![]()
2. Click on ‘Change plan settings’ of the current power plan.

3. Now, click on Change advanced power settings.
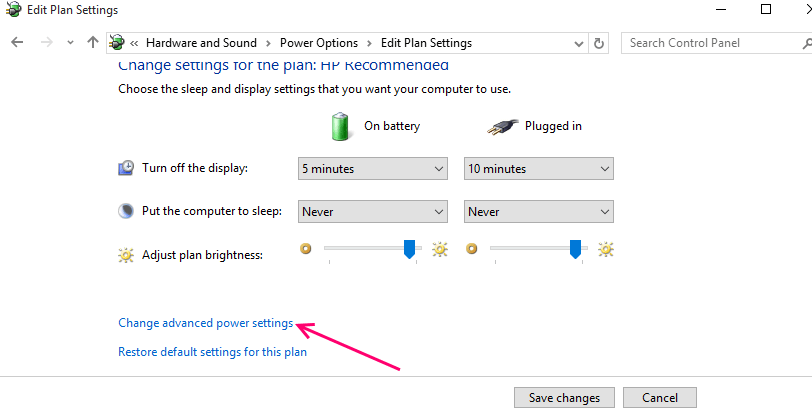
4. Now a popup window will get opened, click on Display and then on Enable adaptive Brightness from the expanded list, turn “off” both ‘on battery’ & ‘plugged in’ option. Click on Apply to save changes. Check if this fixes your problem.
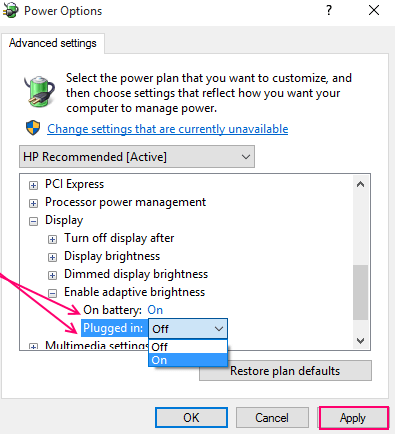
Update your drivers and Enable PnP monitor
From the title of this section, it may be clear that you have to update the drivers related to display. This step has two subsections, proceed accordingly: [Internet required]
Step 2.1 Update Display Adapter drivers
1. Right click on ‘Start’ then click on ‘Device Manager’ Or Search in the taskbar ‘Device Manager’ and click on the top result.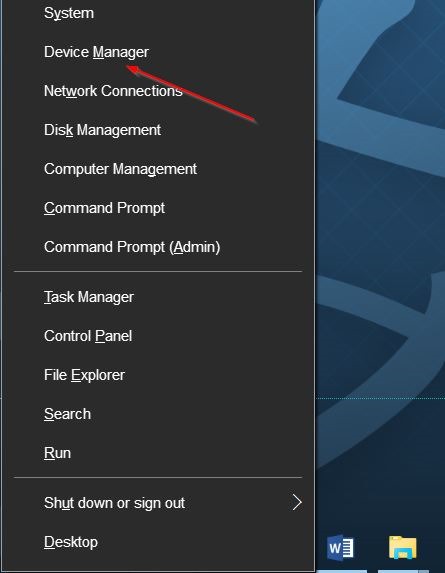
2. Expand the Display adapter and right-click on your Graphic Card Driver then click ‘Update Driver Software’. According to the laptop brand, you may see other drivers on the list. Don’t worry follow the steps with your device display driver in the step mentioned below, everything will be fine. Do not select any other option as it may result in device malfunction.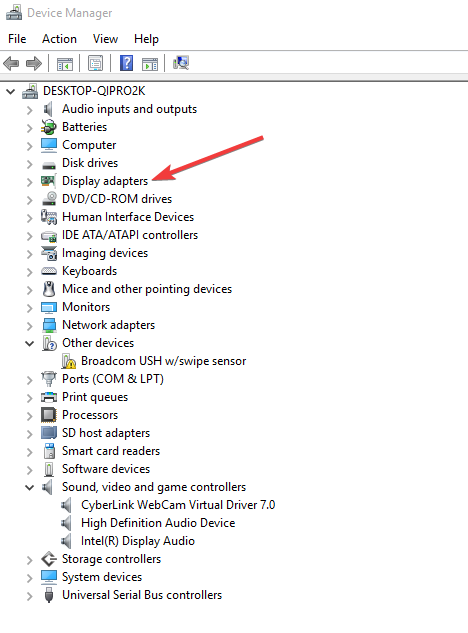
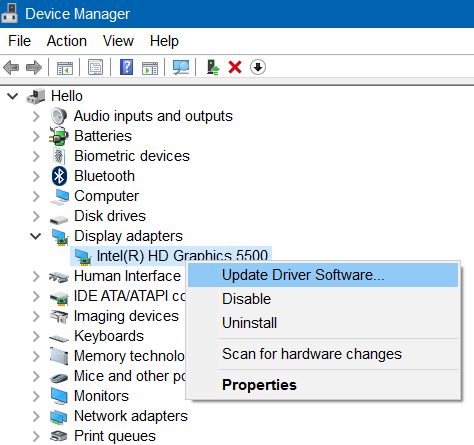
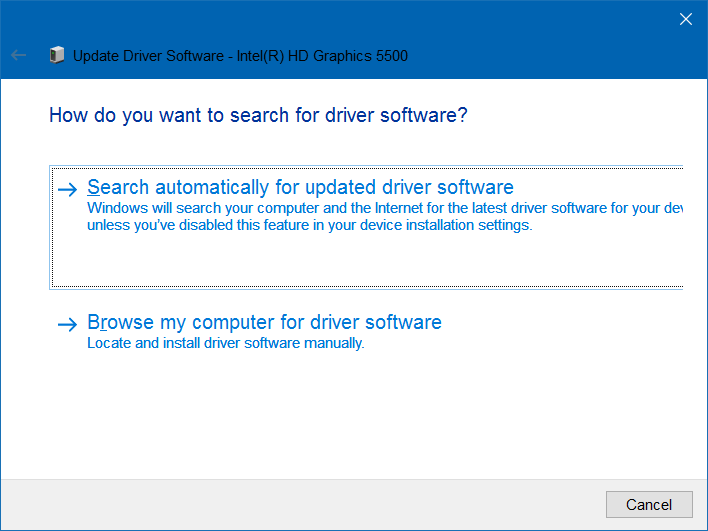
3. After selecting ‘Update Driver Software’, the following popup screen will appear. Click on ‘Search automatically for updated driver Software’. Now Windows 10 will search for the latest drivers and it will be downloaded and installed in your device automatically, so just relax wait for it to complete.***Note:-Drivers are downloaded from official Manufacturer repository and if you want to update manually, DO NOT download drivers from any 3rd party websites. If you’re a newbie I would recommend you to stick to this tutorial.***
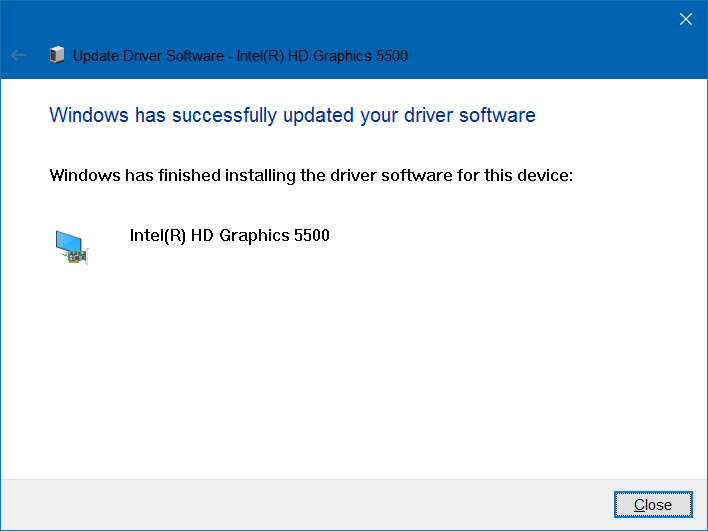
4. After successful completion, the above popup should appear. Close it. Select Action from Menubar located on top then click on ‘Scan for hardware changes’.This step will detect any changes due to the latest driver. After Scan, a popup may appear asking to restart your device. If not, please restart y0ur device manually.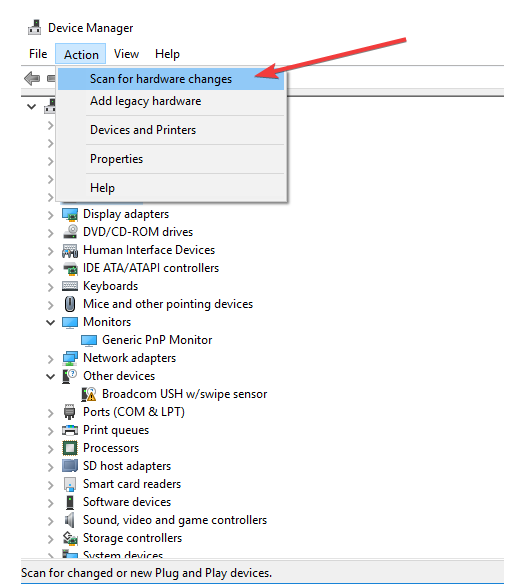
***Check if this fixes your problem. Also, try updating the Graphics Card Driver in the same manner or From Graphics card dashboard(search graphics card brand name e.g. AMD in taskbar) .***
2.2 Enable Generic PnP Monitor
For some reasons (usually due to some graphics intensive software), Generic PnP Monitor might get disabled. This is a prime reason for brightness not working in some manufacturers. This can occur due to the installation of new software which can conflict with Generic PnP Monitor so it gets disabled.
1. Goto ‘Device Manager’ as in step 2.1.
2. Select Monitors, then click on Generic PnP Monitor to check if it is enabled. If No, click on Enable. Also, check for updates and update it.
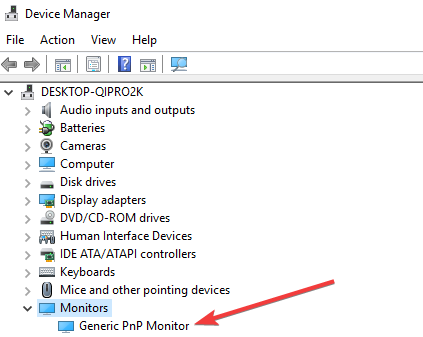
3. Now, click on Action, then Scan for hardware changes. Don’t forget to restart your computer to apply changes.
Last Resort- Microsoft Basic Display Adapter
Try this method as last resort, after all the steps mentioned above. In this step, we are going to set device standard graphics card driver as ‘Microsoft Basic Display Adapter’. Many users claim that this method will fix Screen Brightness Not Working issues in Windows 10, 8 and 7 Laptops.
1. Goto Device Manager, then click on Display adapters. Click your Graphics Card, right-click to select Update Device Driver.
2. Select ‘Browse my Computer for driver software’ then from the list of drivers select ‘Microsoft Basic Display Adapter’.Then click on Next to install.
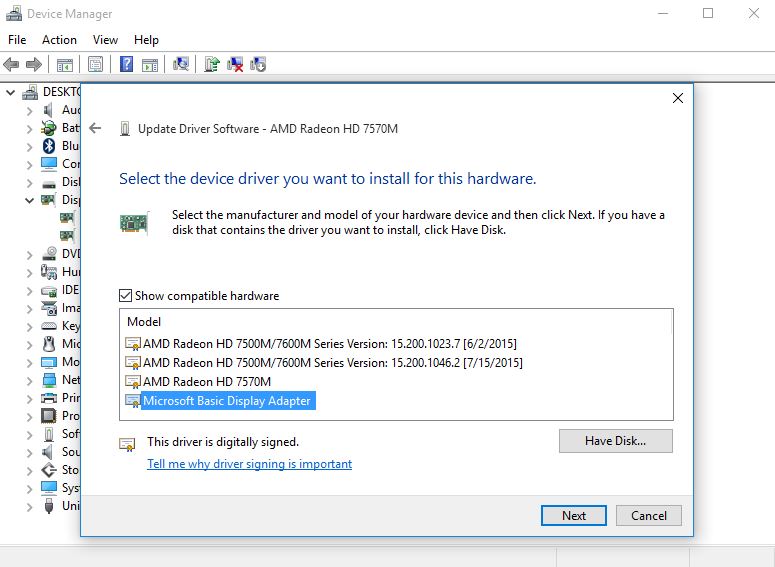
3. Click on Action, then Scan for hardware changes. Now, restart your computer to apply changes successfully.
Hope that this must have solved your problem. If not, check that last update of Windows 10 was installed in your computer properly; otherwise rollback to the previous version of Windows 10. If this is a new device, contact the manufacturer as your device is in warranty and your problem will be resolved free of cost.
Conclusion
The above steps followed in the mentioned order should fix the brightness not working in Windows 10.
Note:-Not all windows 10 devices face this problem. There are other alternatives but they require advanced knowledge of Computer Science and can corrupt your system if done wrong. Therefore, contact the service center of your laptop manufacturer. Hope! this article by Masterra was useful.
