Blue Screen of Death (BSOD) errors are probably the most annoying kind of errors. One very frustrating BSOD error is PAGE FAULT IN NONPAGED AREA. Assuming that you are here to get some help, I will explain you details about this error coupled with methods to fix it.
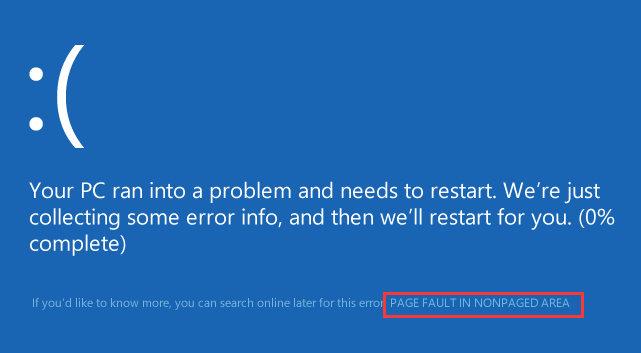
What is PAGE FAULT IN NONPAGED AREA Error?
The Non-Paged area is a compartment of memory that contains data that is critical for the running of the system. This data is always required, and hence instead of swapping the data back and forth between the RAM and the page file, the data is stored constantly in RAM, in the non-paged area. Basically, this area is where data that should not be moved from RAM to the page file is stored. When Windows fails to access critical data from memory that was supposed to be stored in the Non-Paged area, due to some reasons, the PAGE FAULT IN NONPAGED AREA error takes birth.
This error may occur in a desktop as well as in a laptop working on Windows XP, Vista, 7, 8, 8.1 and 10. While facing this error, you may see error codes like STOP: 0X00000050, STOP: 0x50 etc. However, sometimes it may also appear with names like ntfs.sys or ntoskrnl.exe.

Due to this problem, system restore may stop working, system may start crashing frequently, losing data, failing hardware, or even complete loss of access to PC may happen.
Causes
There are varying causes for the development of Page Fault in Nonpaged Area BSOD error in different systems. You should learn the superficial knowledge about the causes in order to learn how to fix this error. I will tell you about the common causes that might be causing the issue. These are the possible causes:
- Corrupted, outdated or incorrectly configured device drivers, especially the Graphic card drivers.
- Damaged or corrupted sectors on hard drive on which you have installed Windows.
- Some fault in RAM.
- Disabled or incorrectly configured Page memory in the Properties of the system.
- Disabled or interfering anti-virus software, especially Windows Defender in Windows 10.
There may be certain other reasons too, but I’m providing you solutions regardless of the exact reason.
Page Fault in Nonpaged Area Windows Install is one of the most common searched query as this error often comes while installing Windows 10 or any other Windows OS
How to Fix Page Fault in Nonpaged Area
I’m providing you the list coupled with the guide of Best Methods to fix this error without doing too much work. You can try any method selectively or you can try them one after another.
1. Repair Faulty Driver
Sometimes when you update a driver, it may not update correctly and therefore starts causing problems. In thi method, you have too look up for such problematic drivers and repair the. Follow these steps:
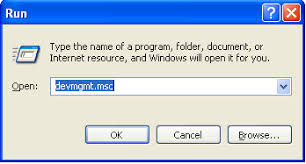
Step-1: Press and hold the Windows key + R to access the Run dialog box. Type devmgmt.msc in it and press Enter in order to open the Device Manager.
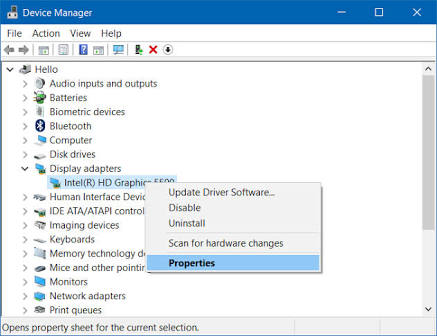
Step-2: Now right-click on the device whose driver you updated recently and go to Properties.
Step-3: Switch to the Driver tab and then click on the Roll Back Driver option. Afterwards, click on Ok.
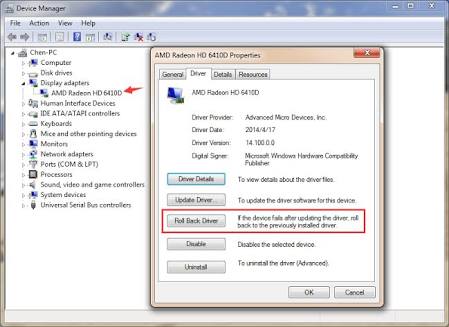
Step-4: If such option is not present for your system, then click on Uninstall option.
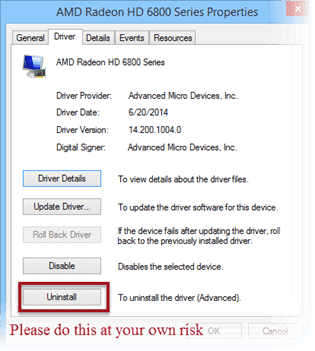
Step-5: Restart your PC in order to re-install the drivers automatically.
Or,
You can also repair and update the faulty drivers using third-party softwares like Driver Talent, Driver Easy, etc. Using these apps is like having a piece of cake. Just open them and follow the instructions coming on your screen
Done. This might have repaired the error in your system. If the error is still there, try the next method.
2. Adjust Paging File Manager
If the hardware and drivers are working fine, yet you are facing the Page Fault in Nonpaged Area error. This method will work perfectly for you. Follow these steps:
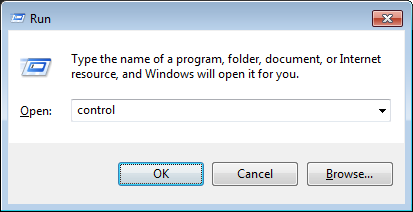
Step-1: Open Control Panel. You can do this by typing control in either Run or Search box.
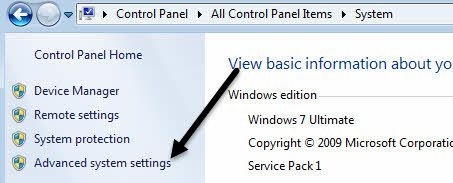
Step-2: Now click on System to access it.

Step-3: Move the cursor to the left side and click on Advanced system settings.
Step-3: Now switch to the Advanced tab and click on Settings under the Performance option.

Step-4: Now here also switch to Advanced tab and click on Change… option under the Virtual memory option.

Step-5: Then uncheck the “Automatically manage paging file size for all drives” check box. Also, select No paging file option and click on Set.

Step-6: Keep on clicking Ok until you close all the Windows dialog boxes and then restart your computer.
Step-7: Now do from Step-1 to Step-4 again. For the next action, this time check the “Automatically manage paging file size for all drives” and select the System Managed Size option. Click on Set and complete the process.
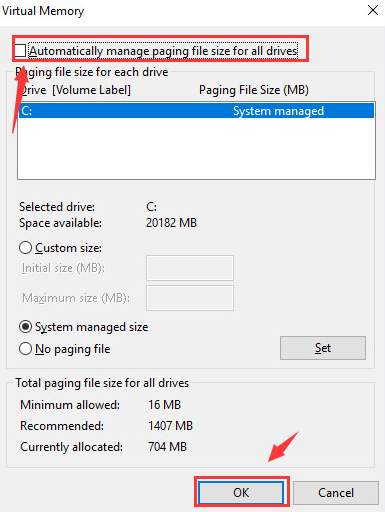
Done. You have completed the procedure. This may have resolved the issue. If it didn’t, scroll down to the next method.
3. Run Check Disk and Memory Check
If the corrupted RAM or faulty NTFS volume are the cause for the PPage Fault in Nonpaged Area error in your Windows 10, 8, 7 PC, this method will solve your problem. Follow these steps in order to fix the error:
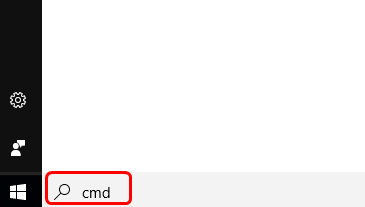
Step-1 Press the Windows key + S simultaneously in order to access Search box and then type cmd in it.
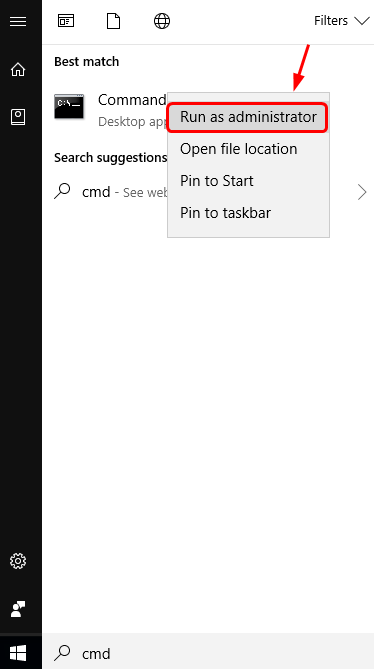
Step-2: Now right-click on the Command Prompt and click on Run as administrator.
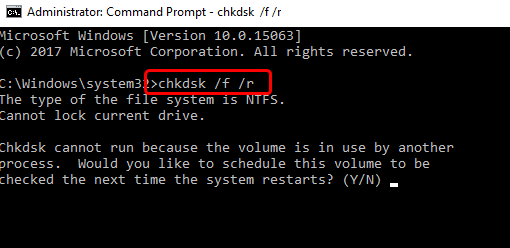
Step-3: In the Command Prompt, type chkdsk /f /r and then press Enter.
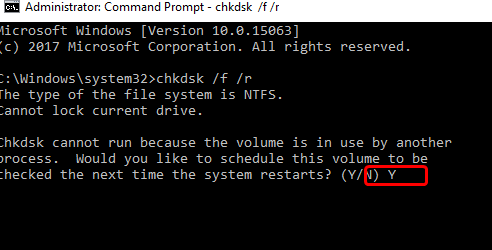
Step-4: Then press Y on your keyboard. Wait till the process completes.
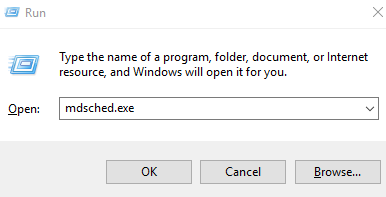
Step-5: Now press the Windows key + R simultaneously in order to open Run dialog box. Type mdsched.exe in it and press Enter to access Windows Memory Diagnostic window.
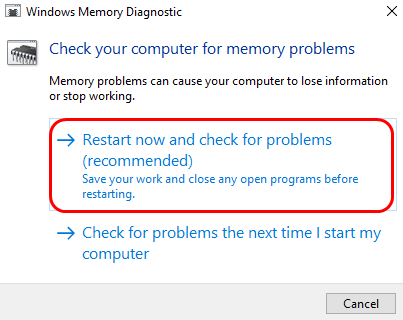
Step-6: Then click on Restart now and check for problems (recommended) options. Your PC will restart then.
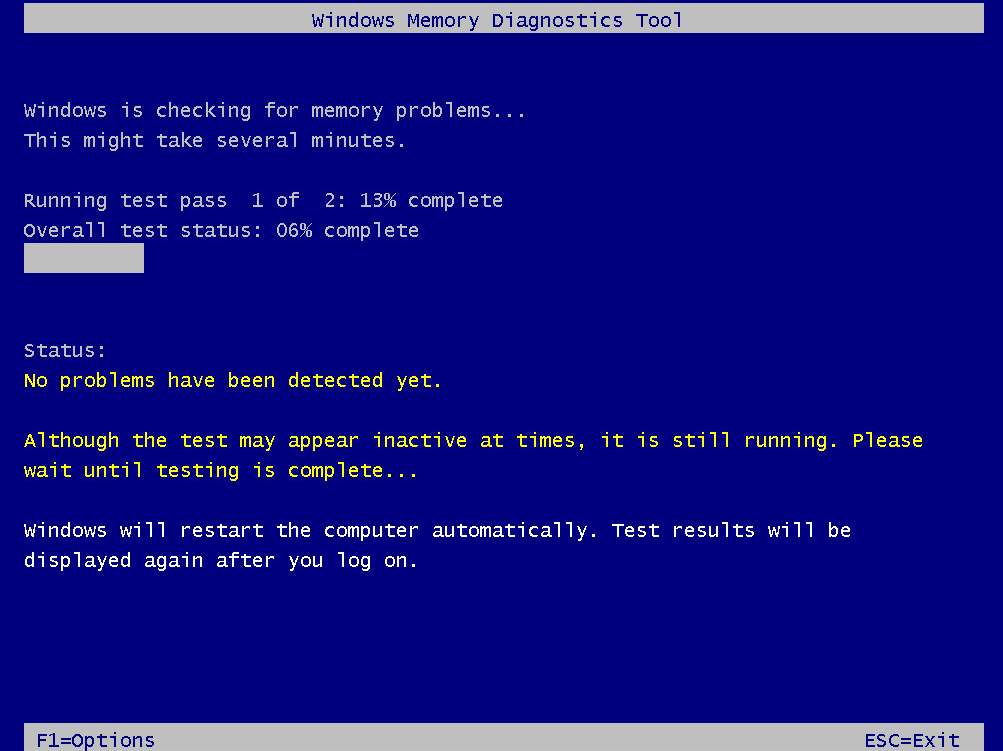
Step-7: Wait patiently till the process completes. It may take about 15 minutes.
Done. This must have solved your problem. If the problem still persists, try another method mentioned below.
4. Use Last Known Good Configuration
This method worked accurately for a lot of users. You can try it out by following these steps:
Step-1: Shut down your PC. Now start your PC. While booting, you will see a black screen.
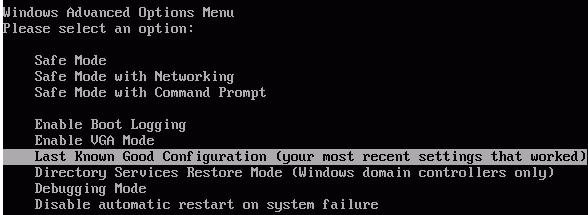
Step-2: When some white text starts coming on this black screen, press and hold F8 key (Hold F2 if F8 is not working in your case). Keep pressing the key until you see Windows Advance Options Menu.
Note: In Windows 8, 8.1 & 10, you need to Enable F8 key first.
Step-3: From the list of options appearing on your screen, select the Last Known Good Configuration one and press Enter. Your PC will restart then and the error will be fixed temporarily.
Step-4: Shut down and Start your PC again but this time press and hold the F12 key (Hold F10 if F12 is not working in your case) when you the white text coming on black screen.
Step-5: From the list of available options, find and select Disable Memory cache, save the setting and exit.
Step-6: Restart your PC and let it boot completely.
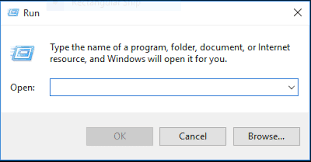
Step-7: Now press the Windows key + R to open Run. Type chkdsk /f /r C: in it and press Enter.
Step-8: Wait patiently till the process finishes.
Done. You have successfully solved the problem like a pro. However, there are more ways if you still want to try. Scroll down.
Solve Page Fault in Nonpaged Area Windows 10, 8, 7, XP
Sometimes, simple methods work like charm as compared to the complex ones. These are some easy methods that you should try in order to fix Page Fault in Nonpaged Area Windows 10.
Fix by Disabling or Uninstalling Anti-Virus

If the anti-virus programme is causing the problem in your system, you should try either disabling or uninstalling the anti-virus software. Then check if the error is gone.
Note: Disabling or uninstalling the anti-virus is one risky action and is not recommended on a permanent basis.
Windows 7 Fix
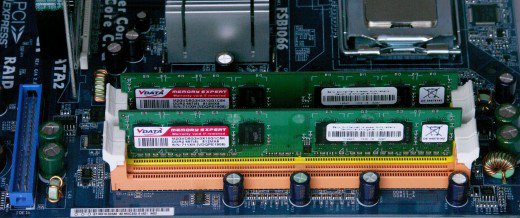
If the RAM is the main culprit behind this error, you should open the CPU external panel and check your RAM for problems. You should remove the RAM, clean it wisely and then re-insert it properly. Then restart your PC and check for the error.
Note: RAM is one delicate part of your computer. You should handle it with care or else you may damage it permanently.
Page_Fault_in_Nonpaged_Area Windows 8, XP Fix
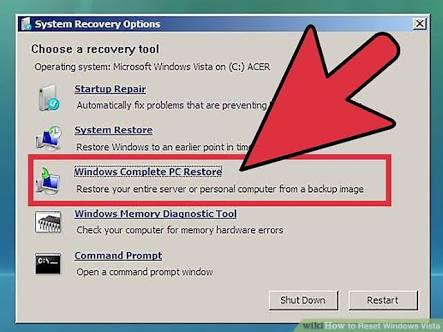
Do the action mentioned in the image.
Modern day systems also allow you to restore your PC to its factory default state by accessing the Recovery Partition. You can learn about the procedure on your manufacturer’s website.
Or,
if you want to access Recovery Manager within Windows, firstly, click on Start button, and then click on All programs. Now select and open Recovery Manager. Then proceed with the recovery process.
Note: Before you move forward with the Recovery process, make sure that you have made the full backup of your computer data somewhere else as the Recovery Process will uninstall all the previous programs and clear media content on your PC / hard drive.
Conclusion
These were the tried and best working methods available to fix Page Fault in Nonpaged Area in Windows XP, Vista, 7, 8, 8.1 and 10. You have successfully cleared the error if you applied any of the methods properly. You can now enjoy using your PC without getting the BSOD error message on your screen.
