Every browser uses plug-ins in order to work properly and offer features to the user. Plug-ins are basically tools implemented in a browser to enhance the experience of the user. But sometimes these plug-ins fail to load properly at the start of the browser. This error is usually associated with the Adobe Flash Player. Some faulty settings might prevent the plug-in to load properly.

In this article, I am going to show you the methods on how to fix the Chrome couldn’t load plugin error in your Browser.
What is a Plug-in?
A plug-in is an add-on software implemented on browsers to enhance the experience of the user. Every feature you use in a website, the browser takes the help of the plug-ins to offer the feature to you since the browser doesn’t have the tools it needs. Plug-ins are object codes that are always executable. Chrome has one plug-in in it, that too is disabled by default. The plug-in is Adobe Flash Player. The Adobe Flash Player is used to stream videos, audios and view multimedia contents on the Chrome Browser. The plug-in supports many data formats such as XML, JSON etc
What causes the couldn’t load plug-in error in Chrome?
Being an outdated software, The Flash player can be vulnerable and prone to hackers since its patches are remotely executed codes. The reasons for the error are
Faulty Settings– Some faulty settings in Chrome might prevent the plug-in to load properly at startup.
Incompatible version– Sometimes the plug-in version is incompatible with the browser version. Then this error might occur.
How to fix Couldn’t load plugin error in Chrome?
Here, I will be guiding you through the methods by which you can fix the Couldn’t load plug-in error in Chrome. The methods are as follows-
1. Disable Shockwave Player
Disabling the Shockwave Player inside the browser might fix the error. The steps to do so are as follows.
- Open Chrome
- Go to Settings and then Advanced Settings
- Click on Content Settings under Privacy Section
- Disable the Shockwave Player plug-in option
or
- Press Shift +Esc to open the Task Manager in Chrome
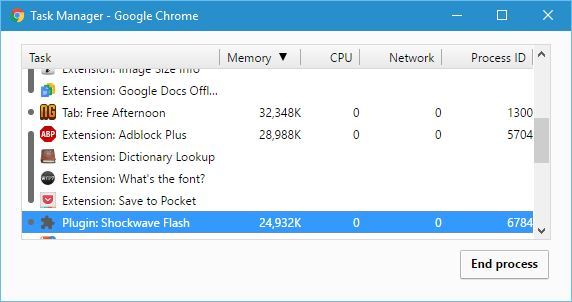
- Then Click on the Shockwave Player plug-in and click on disable
- An error message will appear and then click on Reload
Doing this will fix the error. If not, then follow the other methods
2. Check if Chrome’s up-to-date
Keeping Chrome updated can fix the plug-in error. So to do so follow the steps given below.
- Go to the menu option located at the top right corner
- Then go to Help and then Click on the About Google Chrome option
- Now check if your browser if up to date and if not then going to this option will initiate the update
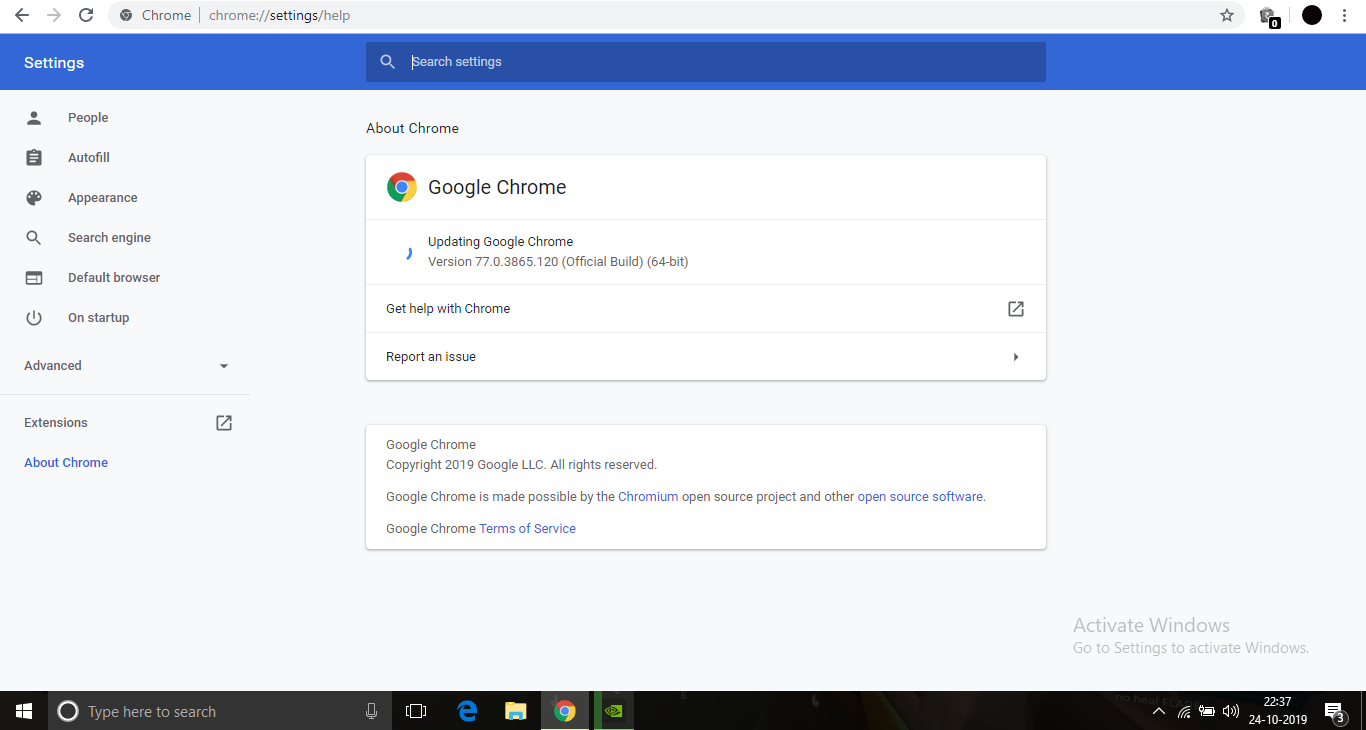
After the update, the error should be fixed.
3. Use DISM commands
Using this option will result in any error detection in your OS and fixing it automatically.
The steps are
- Open Start menu and type cmd.
- Right click on command prompt and click on Run this as administrator.
- This will open Command prompt with administrative priviledge
- Type this code in the Command Prompt –DISM /Online /Cleanup-Image /RestoreHealth and press Enter.
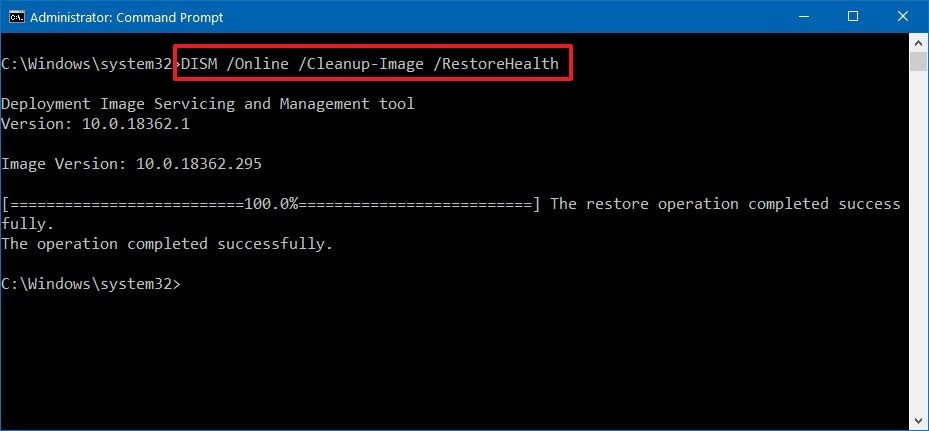
This will check for all the corrupted files in the OS and fix it. After the scan is completed open Chrome and check if the plug-ins are loaded successfully.
4. Run SFC command
- Open Start menu and type cmd.
- Right click on command prompt and click on Run this as administrator.
- This will open Command prompt with administrative priviledge
- Type SFC/ scannow and press Enter
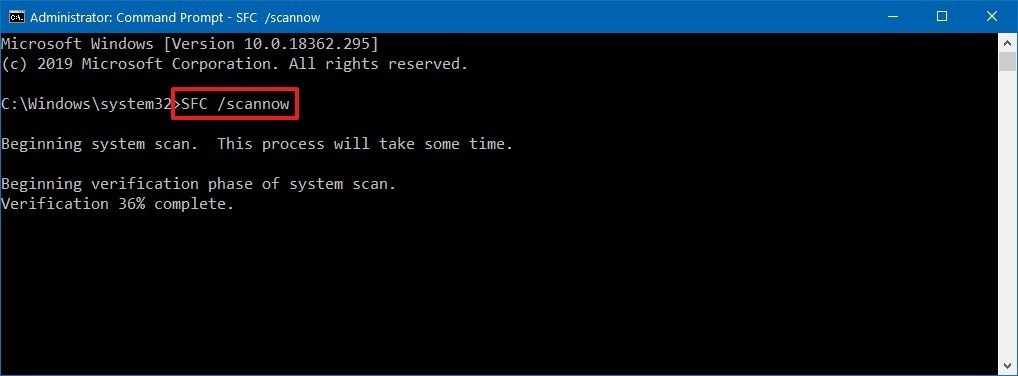
This will also check for corrupted files in the OS. This is the alternate scan for corrupted files if DISM code doesn’t fix the error.
5. Disable PPAPI Flash Plug-in
- Open Chrome
- Type chrome://plugins in the Address bar and press Enter.
- Click details on the list menu
- You will see two versions of Adobe Flash Player. Disable the PPAPI Flash version
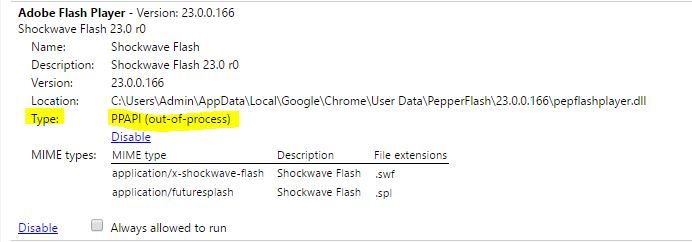
- Restart Chrome and check if the error is fixed
6. Delete PepperFlash Folder
Before trying this method, make sure Chrome is completely closed.
To do so, follow the steps
- Press Ctrl+Alt+Del and select Task Manager from the menu
- Then after opening Task Manager, search for Chrome in the active processes.
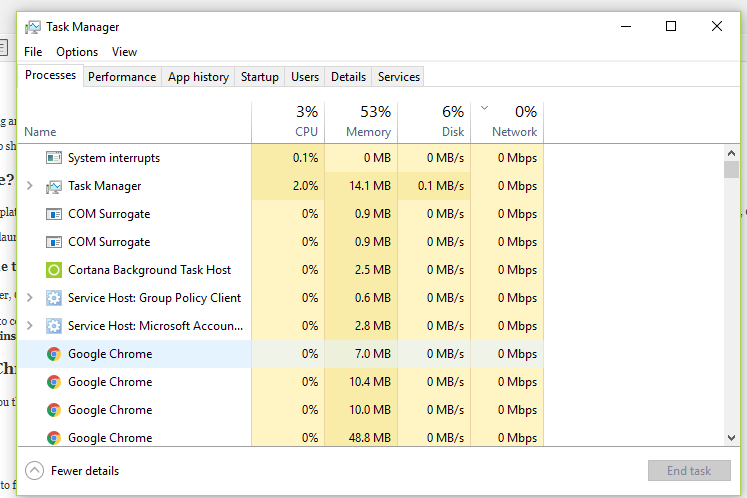
- Right click on the Google Chrome and click on End Task.
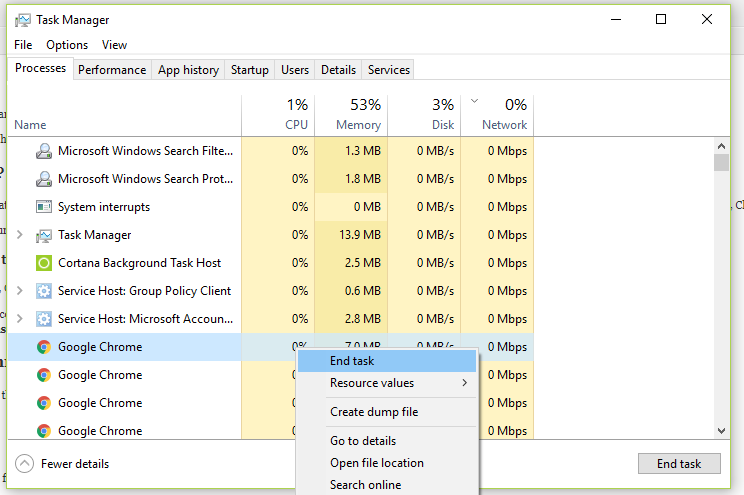
- This will close Chrome from running in background.
Now since you have closed Chrome completely, follow the steps to Delete the PepperFlash folder
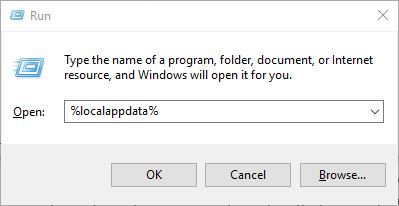
- Press Windows+R to open the run box
- Type %localappdata% and press Enter
- Go to GoogleChrome folder then User Data folder, and Delete the PepperFlash Folder
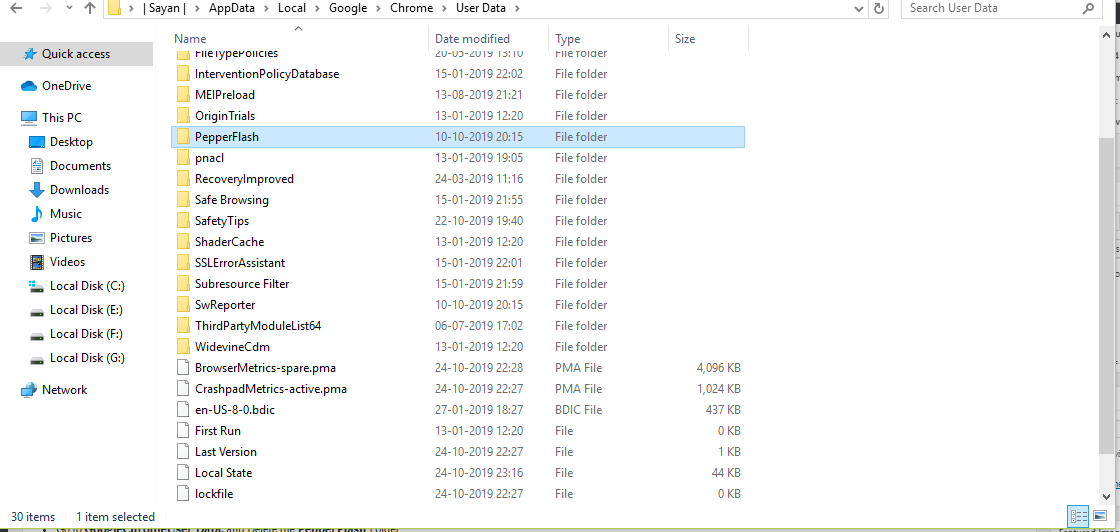
Now that you have deleted the PepperFlash folder, open Chrome and check if the error is fixed.
7. Check Plug-in allowed to run option
- Open Chrome and type chrome://plugins in the Address bar.
- Find Adobe Flash Player and check if the Always allowed to run option is enabled or not.

- If not then enable it.
After enabling it, the error should be fixed.
8. Rename PepperFlash dll file
The plug-in error might occur due to the failure of some pepperflash components. So by renaming the file, the error can be fixed.
- Go to C:\\Users\\Username\\AppData\\Local\\Google\\Chrome\\User Data\\PepperFlash\\32.0.0.171.
- Locate pepflashplayer.dll and rename it as pepflashplayerX.dll and press Enter.
- After doing so, Open Chrome and check if the error is fixed.
9. Reinstall Chrome
If none of the above mentioned methods work, then only try this method.
To uninstall Chrome from your computer, follow the steps
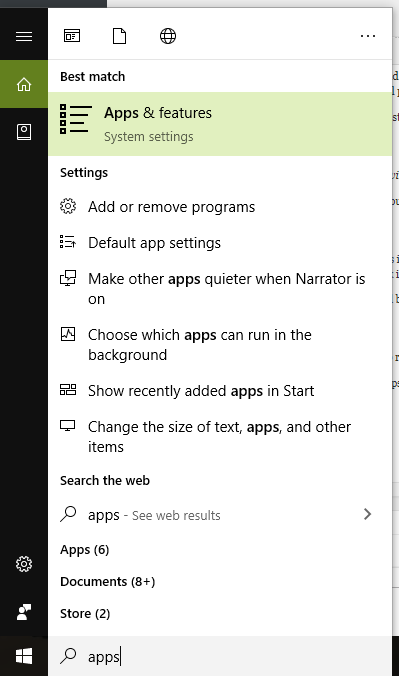
- Open Start menu and type ‘apps‘
- Click on Apps and features.
- Find Google Chrome in the app list
- Right Click in it and click on uninstall
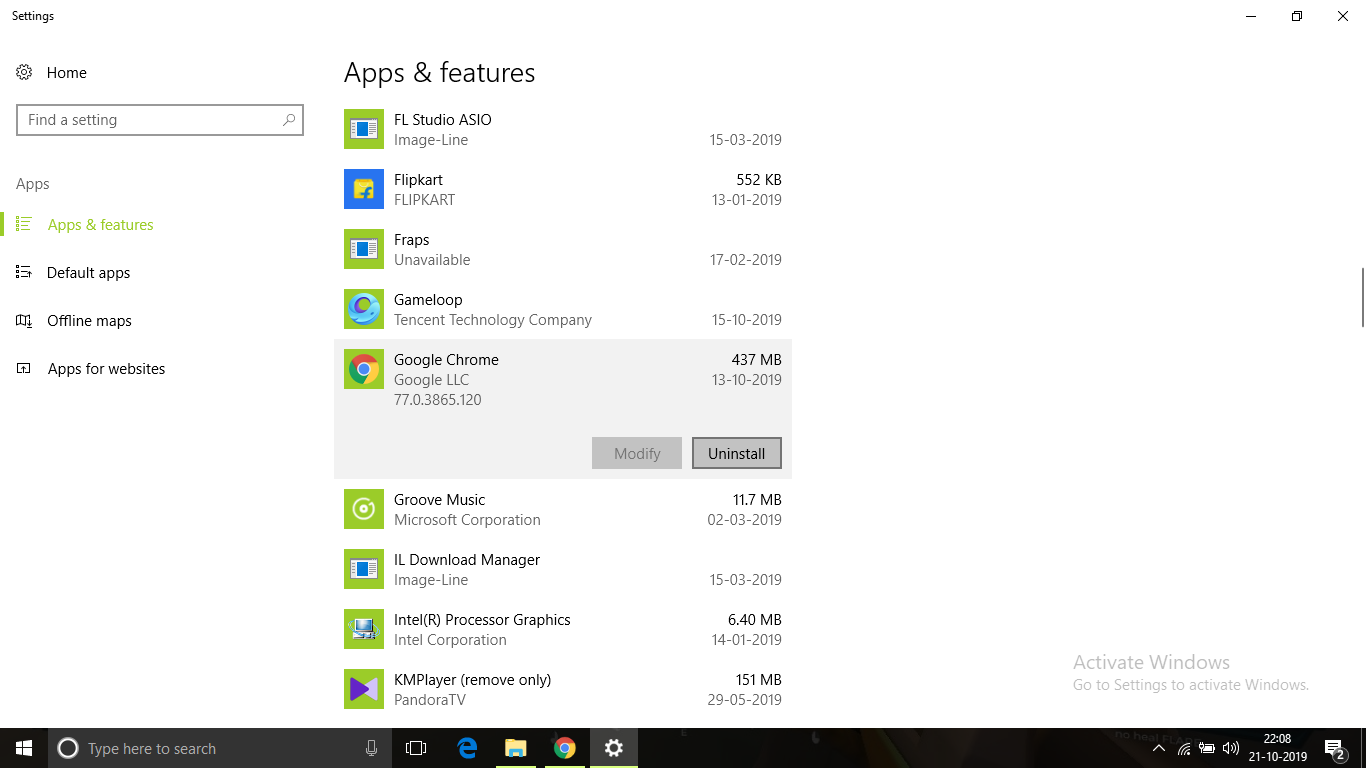
- After uninstalling, download a fresh copy of google chrome installer from the link https://www.google.com/chrome/
After installing Chrome open it and the error should be fixed
Conclusion
These are the possible ways in which you can fix the Couldn’t load plugin error on your Chrome browser. I hope you were able to clearly understand and perform the steps to fix the error.
If the problem isn’t resolved or you are facing difficulty in understanding or performing any of the steps, feel free to comment down below.
