Minecraft is one of the most popular games among the gamers. It is an open world game which is set on a dynamically generated map platform. The game is constantly being updated, so encountering bugs are a common issue. One such common bug is the Unable to update the Minecraft Native Launcher bug. Players are complaining about the inability to update or play the game while encountering the bug. The bug displays Unable to update the Minecraft Native Launcher before the start of the game.
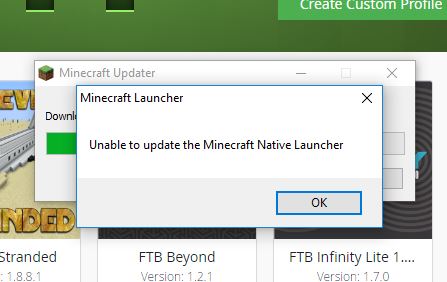
What is Unable to update the Minecraft Native Launcher bug?
Since Minecraft is updated regularly, the launcher might carry some bugs with it which will prevent it to update the new versions. This might be the caused by the launcher update implemented in January.
This bug is being encountered by many players recently which is preventing the players to update the game and play it. But, in this article I am going to show you some methods on how to fix the bug and play the game peacefully.
What causes the Unable to update Minecraft Native Launcher bug?
Due to constant updates to minecraft and Windows 10, it is inevitable that some bugs might come along. It is either because of the launcher updates that were implemented in January or the Antivirus in your Windows 10 PC is preventing the download.
Note: Sometimes the antivirus is the main reasaon behind this bug as it blocks the internet access of the launcher.
or
If your internet connection is slow the launcher will not be able to download the update.
How to Fix the Unable to Update Minecraft Native Launcher bug?
Here, I will be showing you how to fix the Unable to Update Minecraft Native Launcher bug on your PC with necessary steps.
Note: Since the game is being updated regularly, your Windows 10 should be up to date too. So before trying all these methods, Update your Windows 10 to get the best possible results.
Here are the steps on how to update windows 10-
(if you are sure that your windows is updated, then kindly jump to the methods given below for fixing the bug)
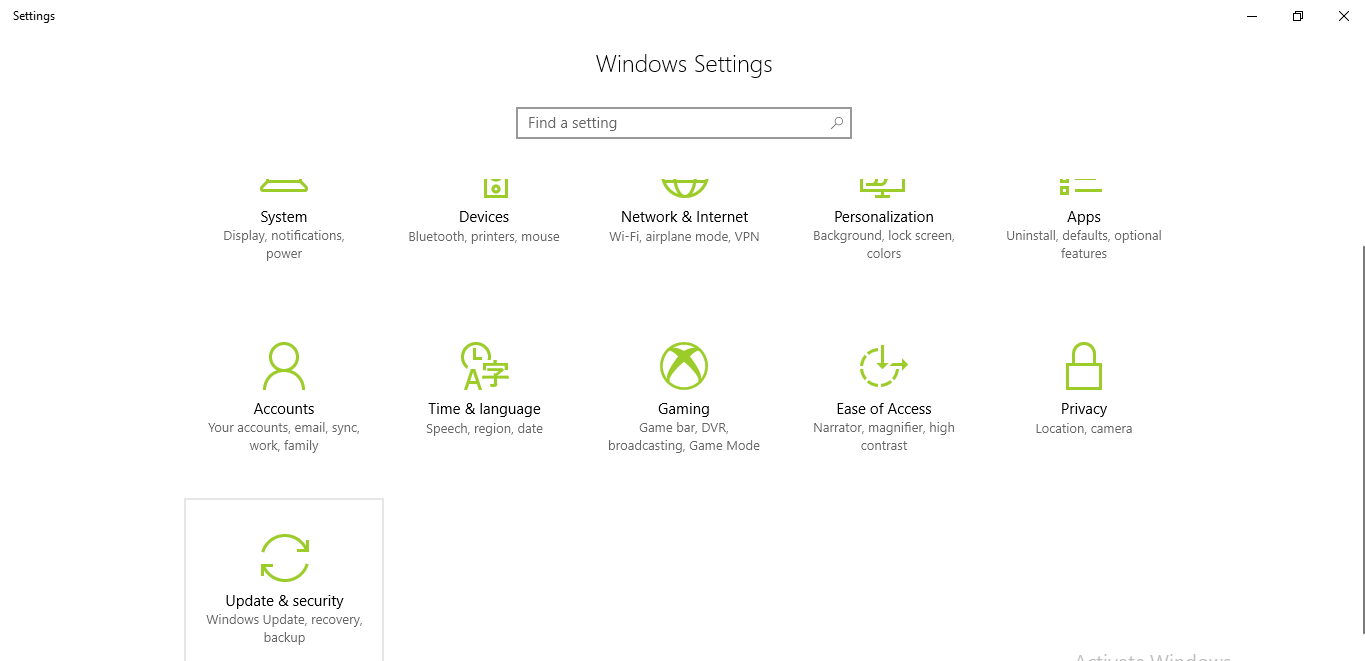
- Press the Windows key on your keyboard and click on Settings option

- Then go to Update and Security option.
- In the Windows update tab check if Windows update are available for your device. If yes, the click on update.
- Once the update is done, click on install updates.
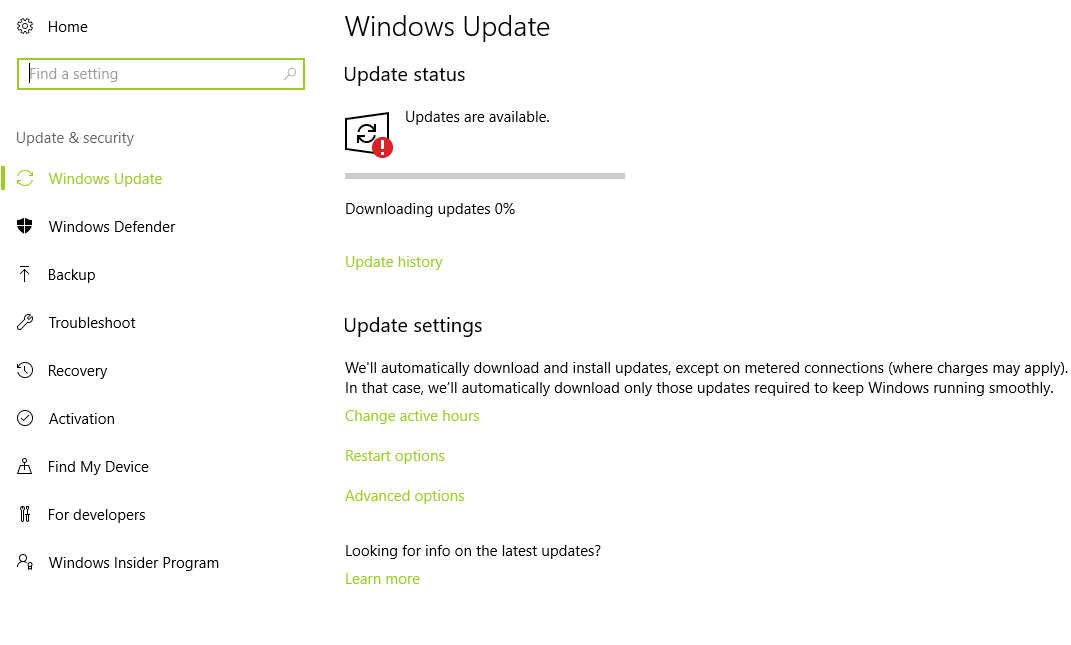
- After installing, it is recommended that you restart your PC and let the update to take effect.
Note: Before restarting, make sure you have closed all applications and saved all the data.
After your windows is up to date, follow these steps to fix the bug.
1. Repair Minecraft in Windows 10
Sometimes applications shows error because of some corrupted or broken files. It is quite common for files to be corrupted over time. But, there is an option in the Windows Program list that allows you to repair the application which has corrupted files. So follow the steps below to fix the bug and play the game.
- Press Windows + R
- Type appwiz.cpl
- Find Minecraft Launcher from the app list and right click on it.
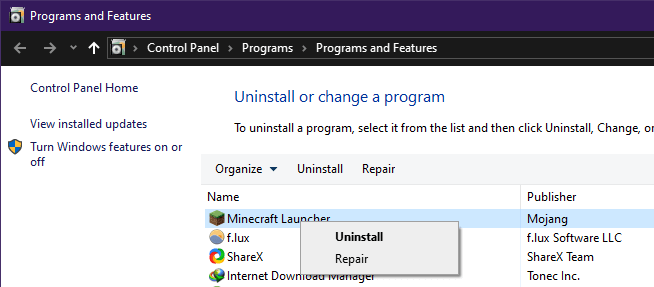
- Press repair
Let the system repair it then try to launch the game.
2. Disabling your active Antivirus
- Try disabling the antivirus of your Windows 10 PC then launch the game. This might fix it because sometimes the antivirus blocks the update.
- Open the antivirus that is running on your PC.
- Turn off ‘Real time Protection’ option on your antivirus.
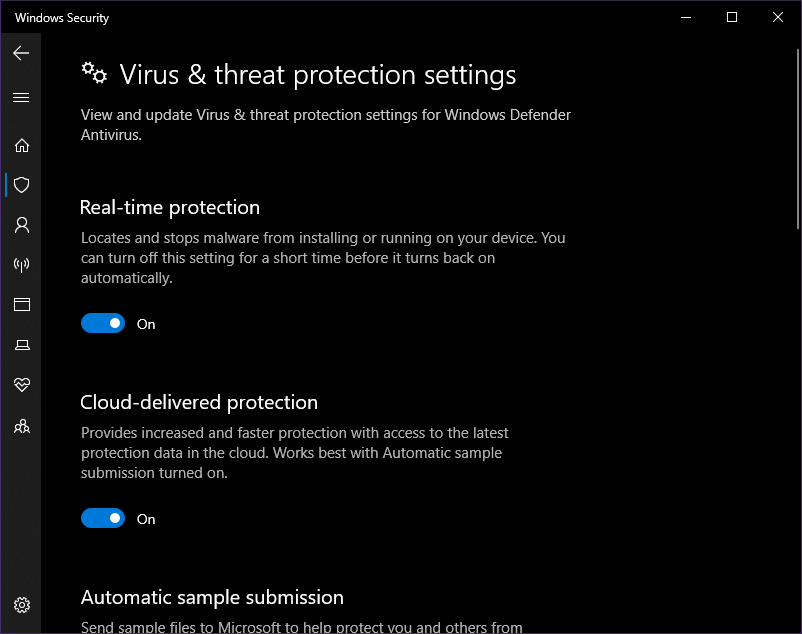
Note: This method is dangerous as you are vulnerable to virus attacks once you disable the option.
or
whitelist Minecraft from the antivirus that is running in your PC.
3. Download a new copy of Minecraft from an external link
Downloading a new copy from an external link might fix the bug since the launcher fails to update the new version of the game. This has solved the problems of many users. If your internet connection is slow or weak the launcher will fail to update and therefore downloading it from an external link will be better.
- Click on https://www.minecraft.net to go the minecraft site.
- Download the game and check if it works.
- If not, then press ‘Try an alternate download‘ option which will be below the Download button.
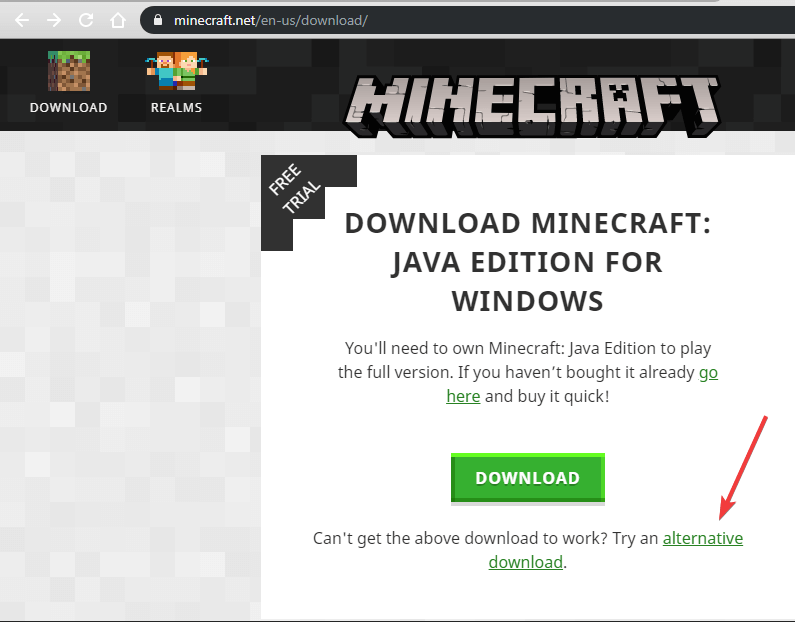
- Download and run the file.
This will fix the problem of the launcher.
4. Remove old Minecraft files from your computer.
- Open File Explorer by pressing Windows + E.
- Type %AppData% in the address bar and press Enter.
- Find Minecraft and delete the folder.
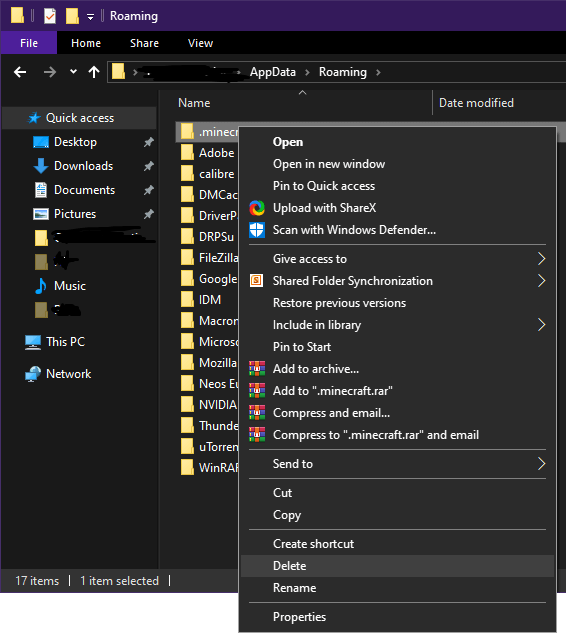
- Launch the game now and check if the game starts.
- Deleting app data will force the game to update to the new version.
5. Resolve Compatibility Issues
- Click on the search option on the taskbar and type ‘Run Programs’.
- Click on the ‘Run Programs made for previous version of Windows’.
- Press next and select the application which you want to troubleshoot.
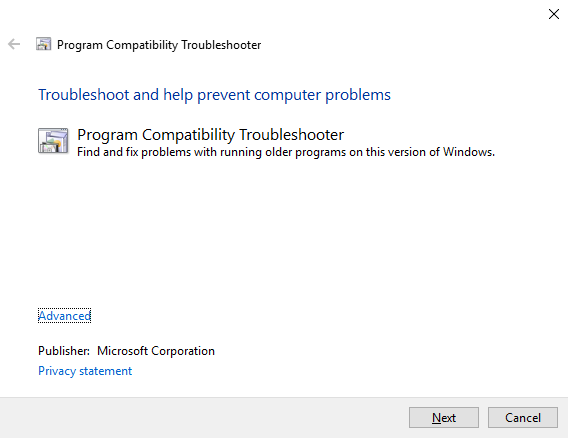
- Select a troubleshooting option: Use the recommended compatibility setting or select the compatibility settings yourself.
This method will solve the problem as it will troubleshoot the error and let you know if the problem is fixed or not.
Conclusion
These are best possible ways in which you can fix the Unable to update the Minecraft Native launcher bug. I hope you were able to clearly understand and perform the steps to fix the bug.
If the problem isn’t resolved or you are facing difficulty in understanding or performing any of the steps, feel free to comment down below.
