Learn How to Disable Touchpad on Windows 10, 8 and 7 easily. You can find multiple ways to disable touch pad in this article.
Touchpad or Trackpad, whatever you call it, has advanced in the last couple of years supporting multiple gestures and other cool features. But, it is still irksome for many users especially gamers. The touchpad has not been able to match the level of comfort or easiness for the generation that grew up using a mouse, although the trackpad is very handy when it comes to traveling.
Laptop users also face difficulty when using the keyboard as it interferes with trackpad due to its proximity and causes trouble!
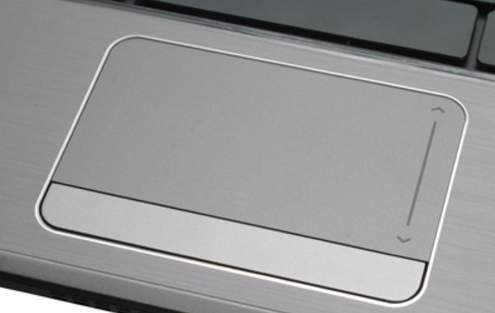
It all boils down to the preference of an individual, as luck would have it Windows 10 comes with advanced controls for Touchpad. Don’t worry we have provided methods for other versions of Windows too in this guide.
How to Disable Touchpad on Windows
Before we proceed to disable the trackpad on Windows, let us ask this question first “Do you want to permanently disable trackpad on Windows ?” or ” Are you looking for disabling touchpad only when the mouse is connected ?“.
Solution to the former question is simply disable or delete the driver associated with touchpad, explained later in the guide. The latter question is more commonly asked and this guide is dedicated to providing the explanations as manufacturers can provide machine (brand) specific solutions to disable the touchpad.

Some manufacturers provide a keyboard shortcut to disable the touchpad, most common commands are ” FN + F9 ” / ” FN + F7 “. Check your laptop model if it supports any of these shortcuts. Otherwise, proceed to the next section.
How to Disable Touchpad on Windows 10
This method is exclusive to Windows 10 users. It equips users with an option to disable touchpad automatically when a mouse is connected to the Windows laptop or simply you can turn off the touchpad. Steps to accomplish this task is very simple, so let’s begin.
1. Open ‘Settings’, either by right-clicking on Start button located on the taskbar and then on Settings or simply pressing ” Windows key + I ” from the keyboard.
2. In Settings, locate ‘Devices‘ and click on it. Then, navigate to “Touchpad” by clicking on it.
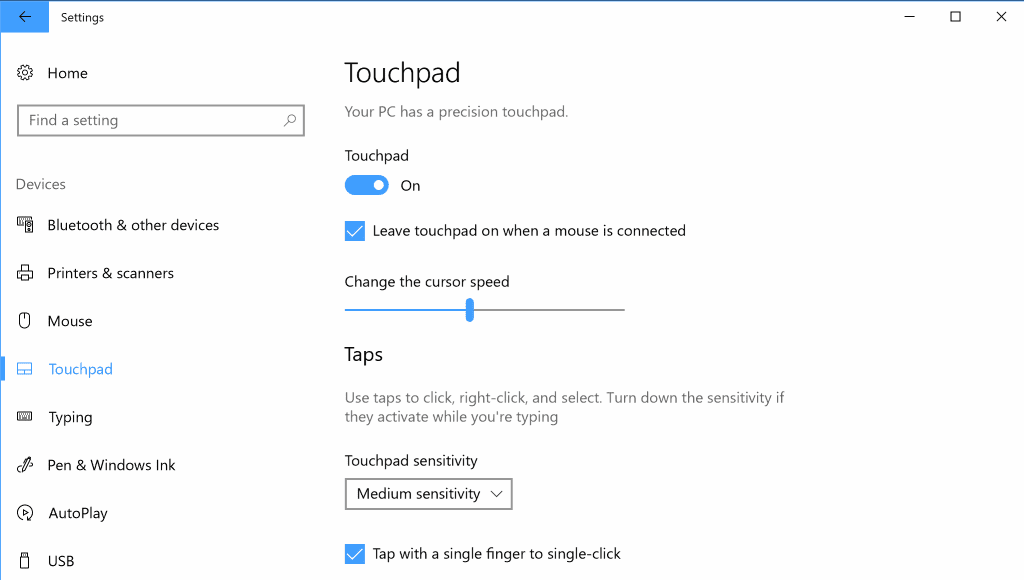
3. Now, you have two choices. The first choice, disable the touchpad, click once at “On” located just under Touchpad heading. Alternatively, you can also, uncheck “Leave touchpad on when a mouse is connected” option to occasionally disable touchpad when a mouse is connected to the laptop.
In the recent windows update, this option has been removed from Windows 10, we don’t know if this change is permanent or will it be available again in future updates. So, if you do not find these options then just follow along to the next method.
Disable Touchpad using Control Panel
Although the method is titled Control Panel however first, we would like you to search for software provided by your manufacturer [usually preloaded] to manage or support laptop and see under devices or mouse tab if the option to disable touchpad is present.
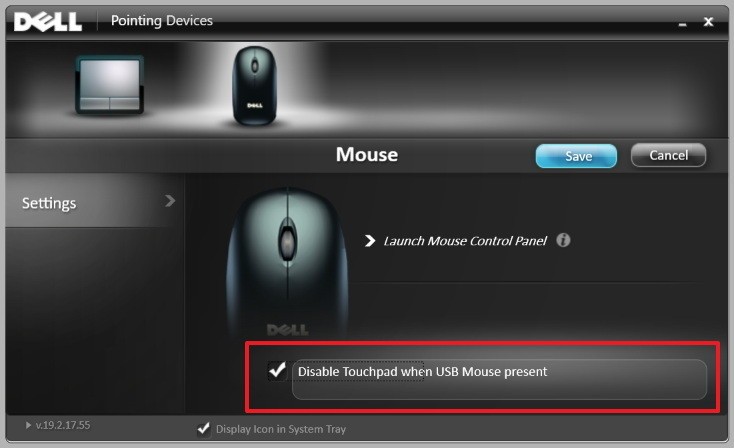
Unlucky! Don’t worry this method should solve your query effectively. It is valid for all versions of Windows, lets us see how it’s done!
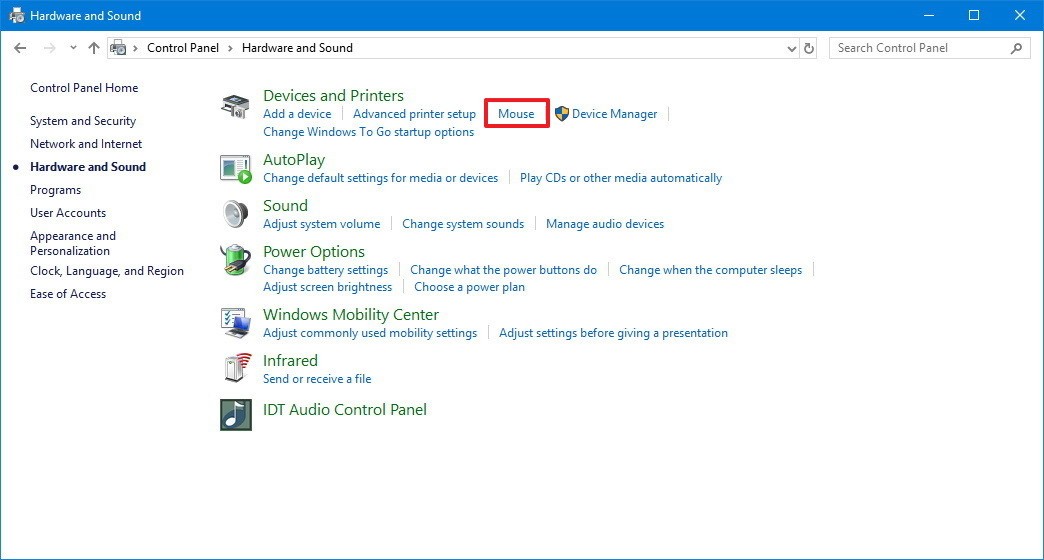
1. Open “Control Panel”. For Windows 10, search the same in the taskbar and click on the first result and for older versions of Windows, Click on Start button and then from the menu, select Control Panel.
2. In Control Panel, click on ‘Hardware and Sound‘ and then navigate to “Devices and Printers“. Locate ” Mouse” and click on it.
3. A new pop up window will appear. Navigate to “Device Settings” tab and check ” Disable touchpad when an external pointing device is connected” option to disable the touchpad when a mouse is available.
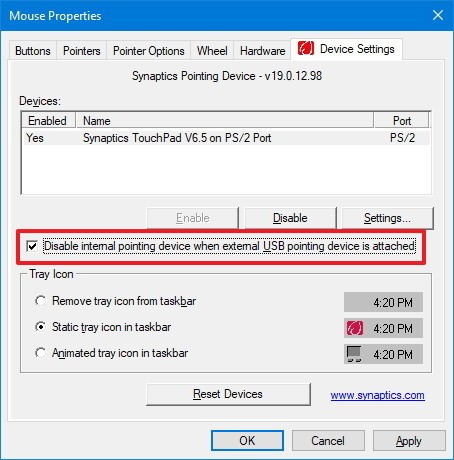
You might find a distinct option other than what is mentioned depending on your laptop model, if this doesn’t resolve your problem navigate to Device Manager section.
Disable using Device Manager
In this part of the guide to disable touchpad in Windows [all versions] will accomplish it by disabling the driver for touchpad itself located in the Device Manager section. Again, drivers name may vary in your laptop, but the procedure will remain the same.
Also, proceeding further will disable your touchpad, and you will have to enable it using the same procedure to use it again, ensure that you have an external mouse connected to your laptop before committing changes.
1. Open ‘Device Manager’ by searching the same in the taskbar and click on the result or just right-click on the Start button and click on Device Manager from the menu.
2. A pop-up window will be opened. Navigate to “Mice and other pointing devices” and click on it to expand.
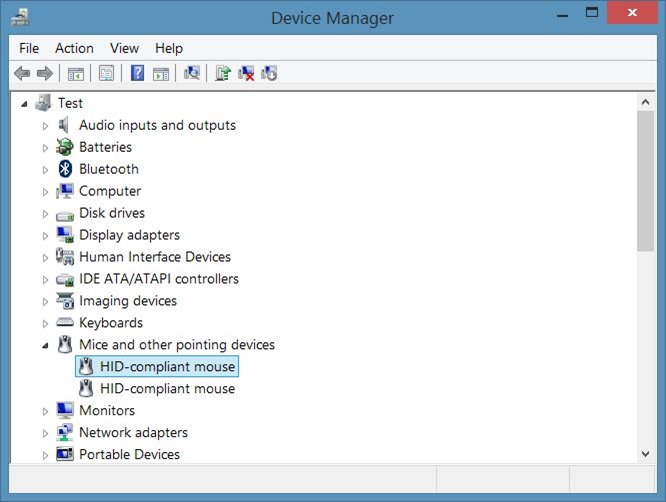
3. Now, you will see all the drivers related pointing devices [mouse, trackpad, etc]. Right-click on the touchpad driver and click on disable or if you are unsure which driver is related to the touchpad, then disable every driver under this section one at a time [re-enable the driver before disabling another one] until you disable the touchpad.
*** Note: Do not delete or uninstall the touchpad driver, as it will get reinstalled by windows automatically next time you start your laptop, so just disable it. ***
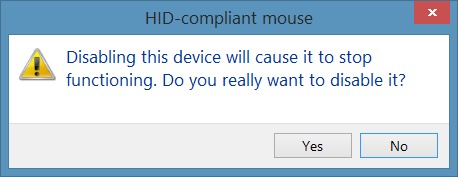
4. You may see this warning, when attempting to disable the driver, just click on “OK” to confirm. As you have made your mind to disable the touchpad on your Windows device, the warning is just a reminder of what you are going to do.
Conclusion
Congratulations! you have finally disabled touchpad in Windows 10, 8 or 7. This task may seem very trivial at first but fixing this issue depends on your Windows version and also on laptop model. Touchpad controls surely suck when it is used for play games or it can even create a problem for some users during typing, we would recommend opting for “disabling touchpad when a mouse is available” as a better option for most users.
Other alternatives are BIOS related or tweaking registry, these options carry a substantial risk that is why it is not recommended by us [Expert guidance needed]. Some 3rd party applications are also available to assist you on this, but it is unnecessary to install as this can be accomplished out without any problem. Visit us again if you encounter another fish in your Windows!
